What it does
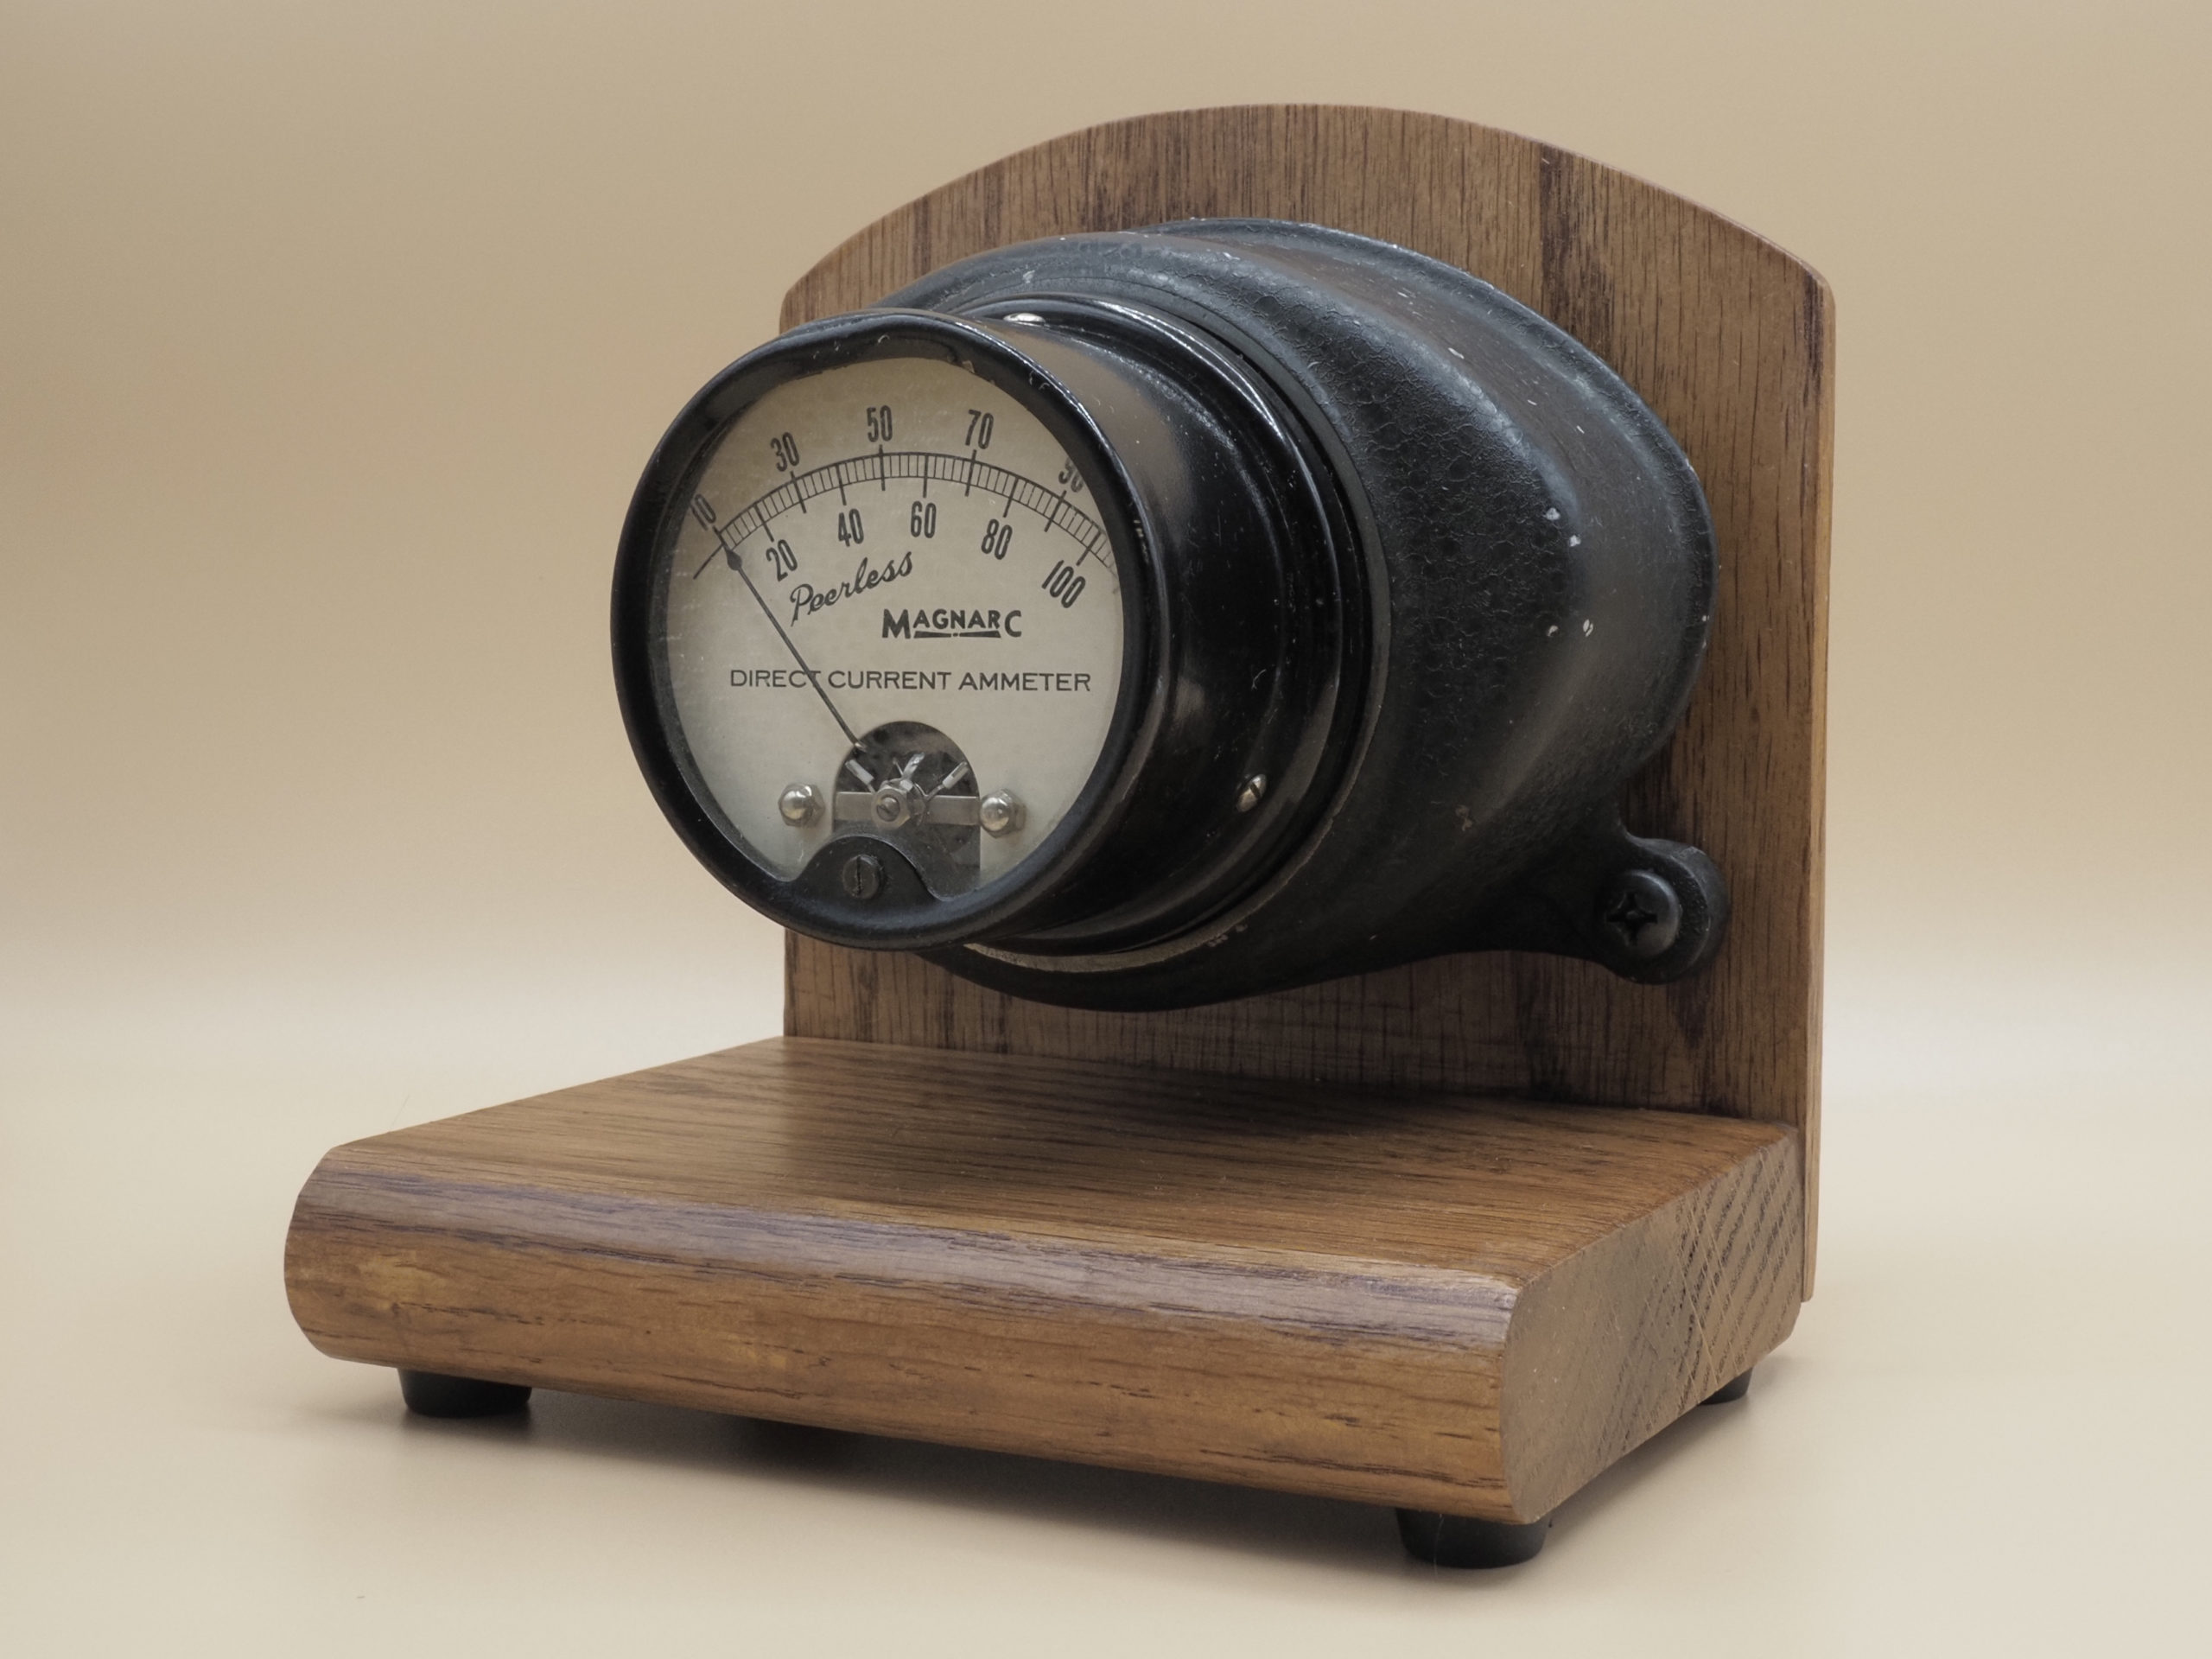
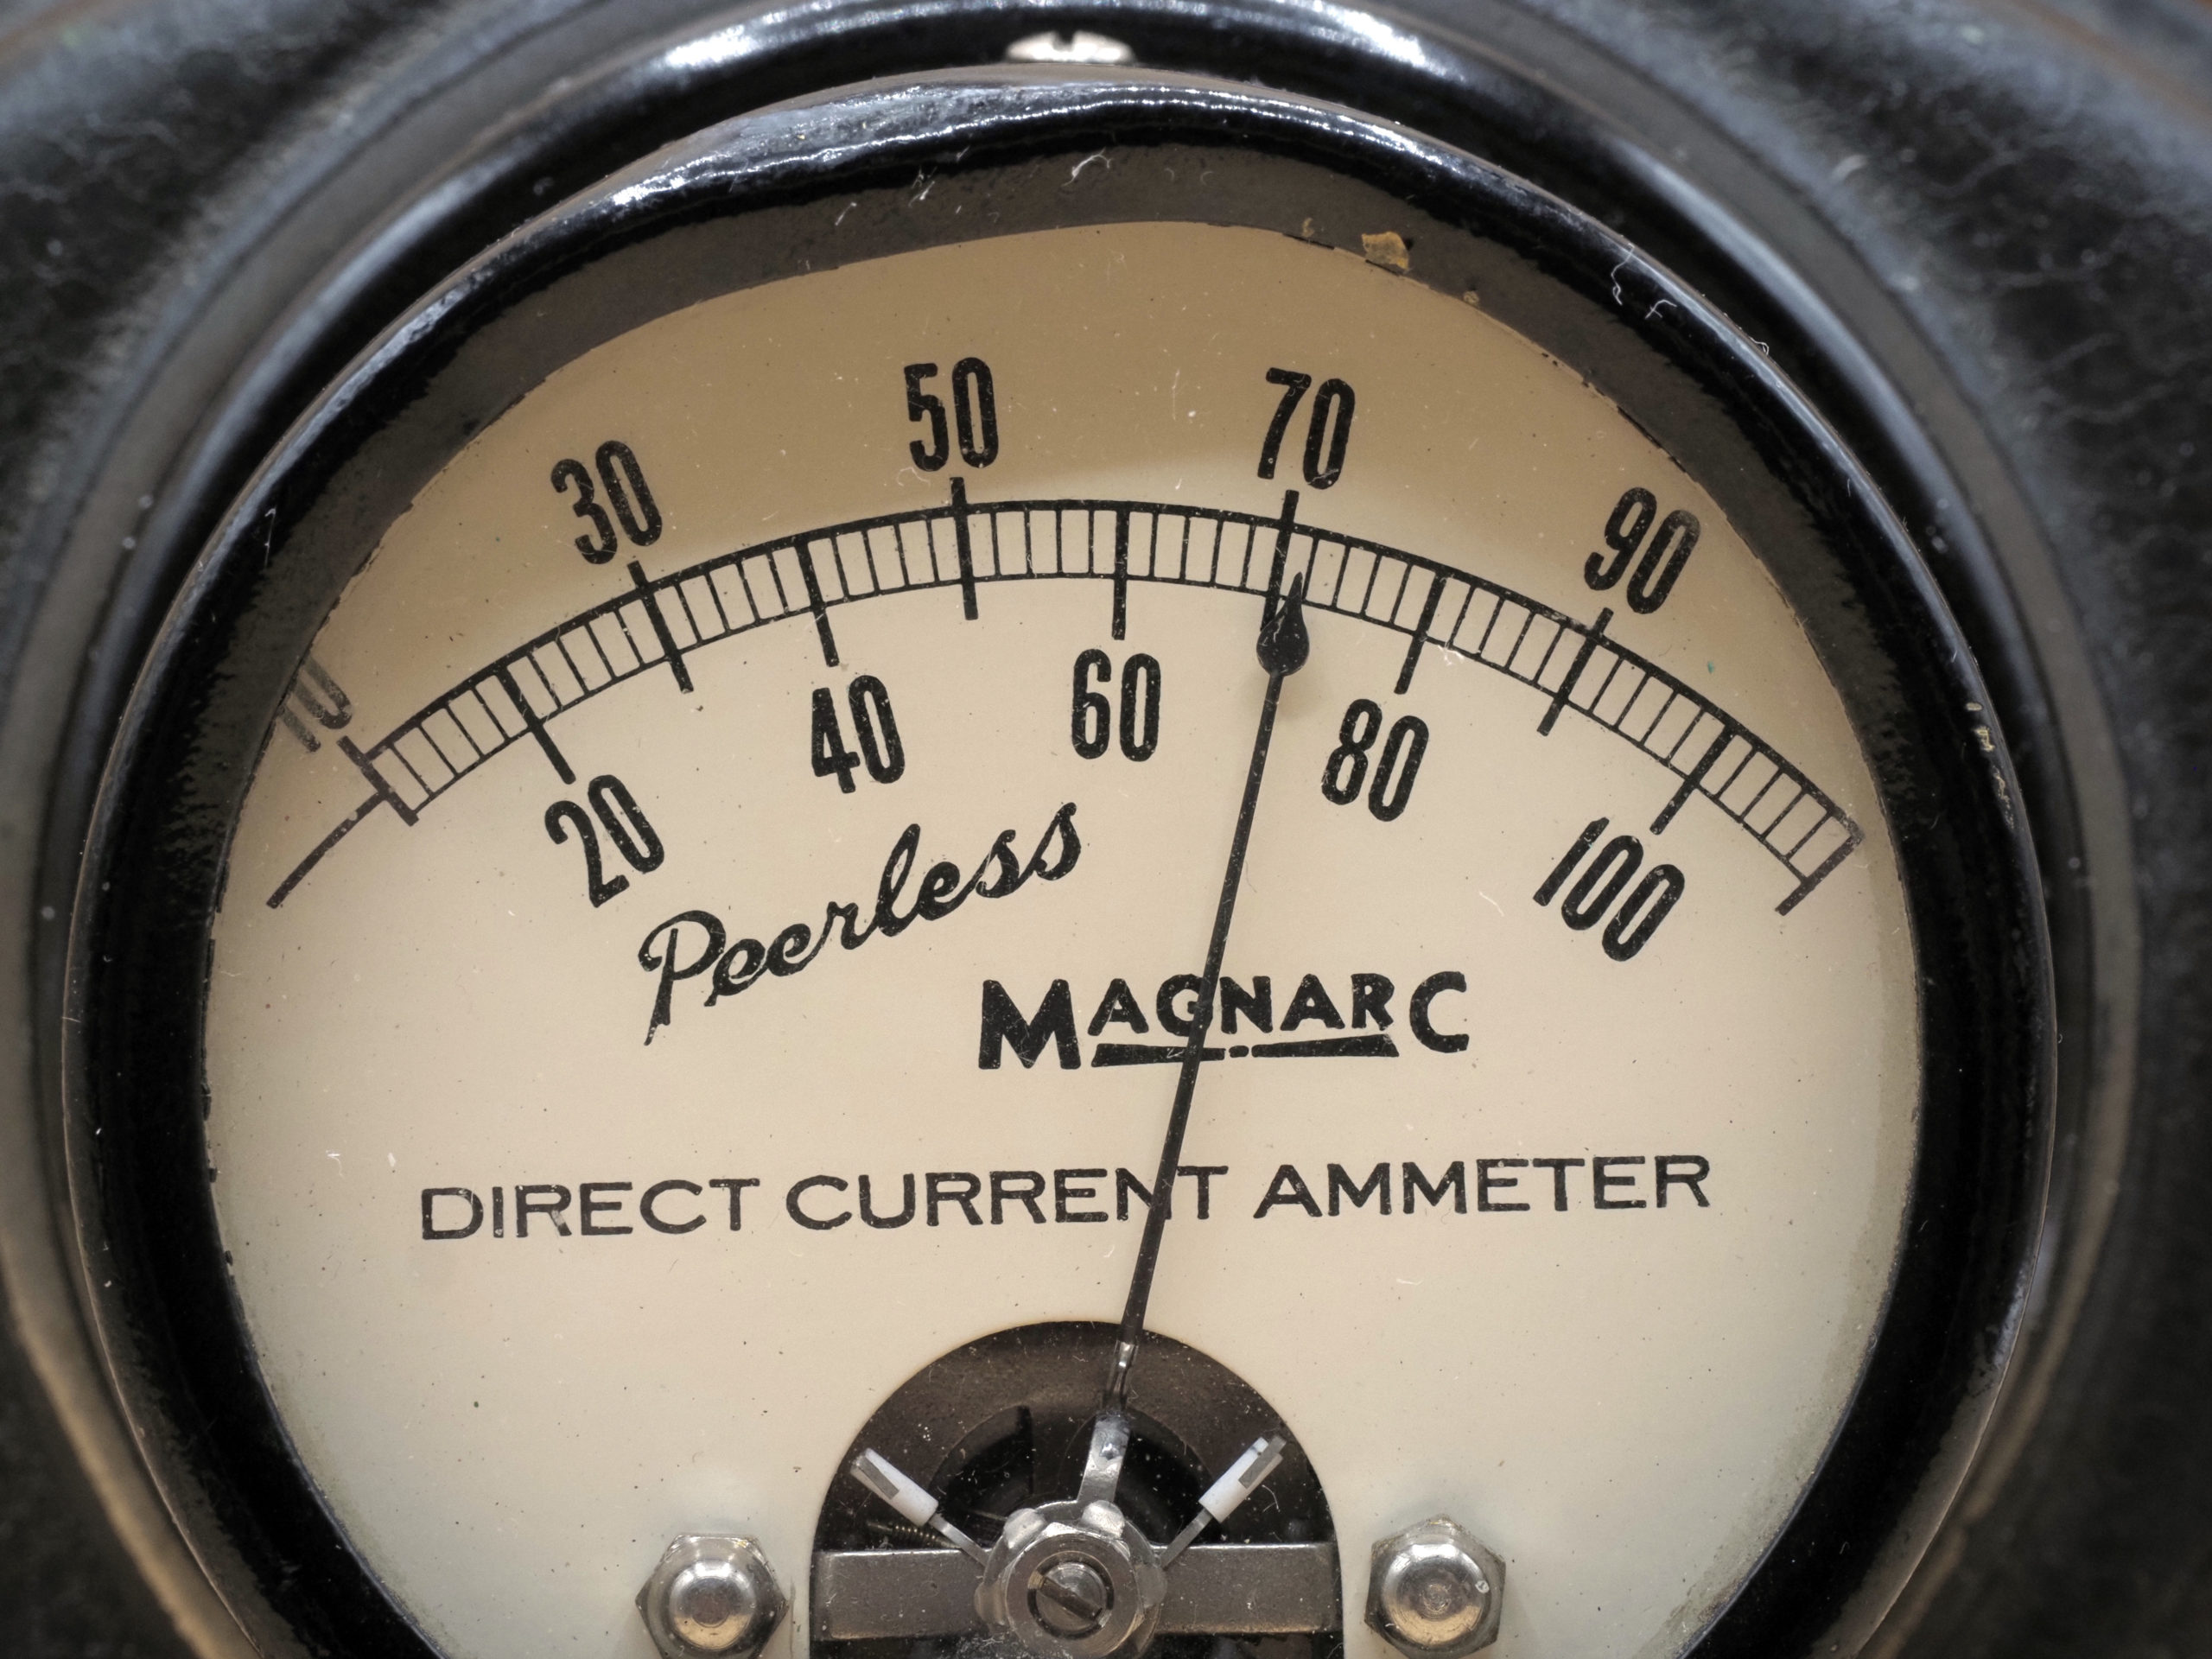
This gadget uses a sensor to measure the indoor temperature or humidity, and displays the reading on the ammeter. The ammeter is from a Peerless Magnarc carbon-arc lamp that was originally used in a movie projector or a spotlight.
Provenance
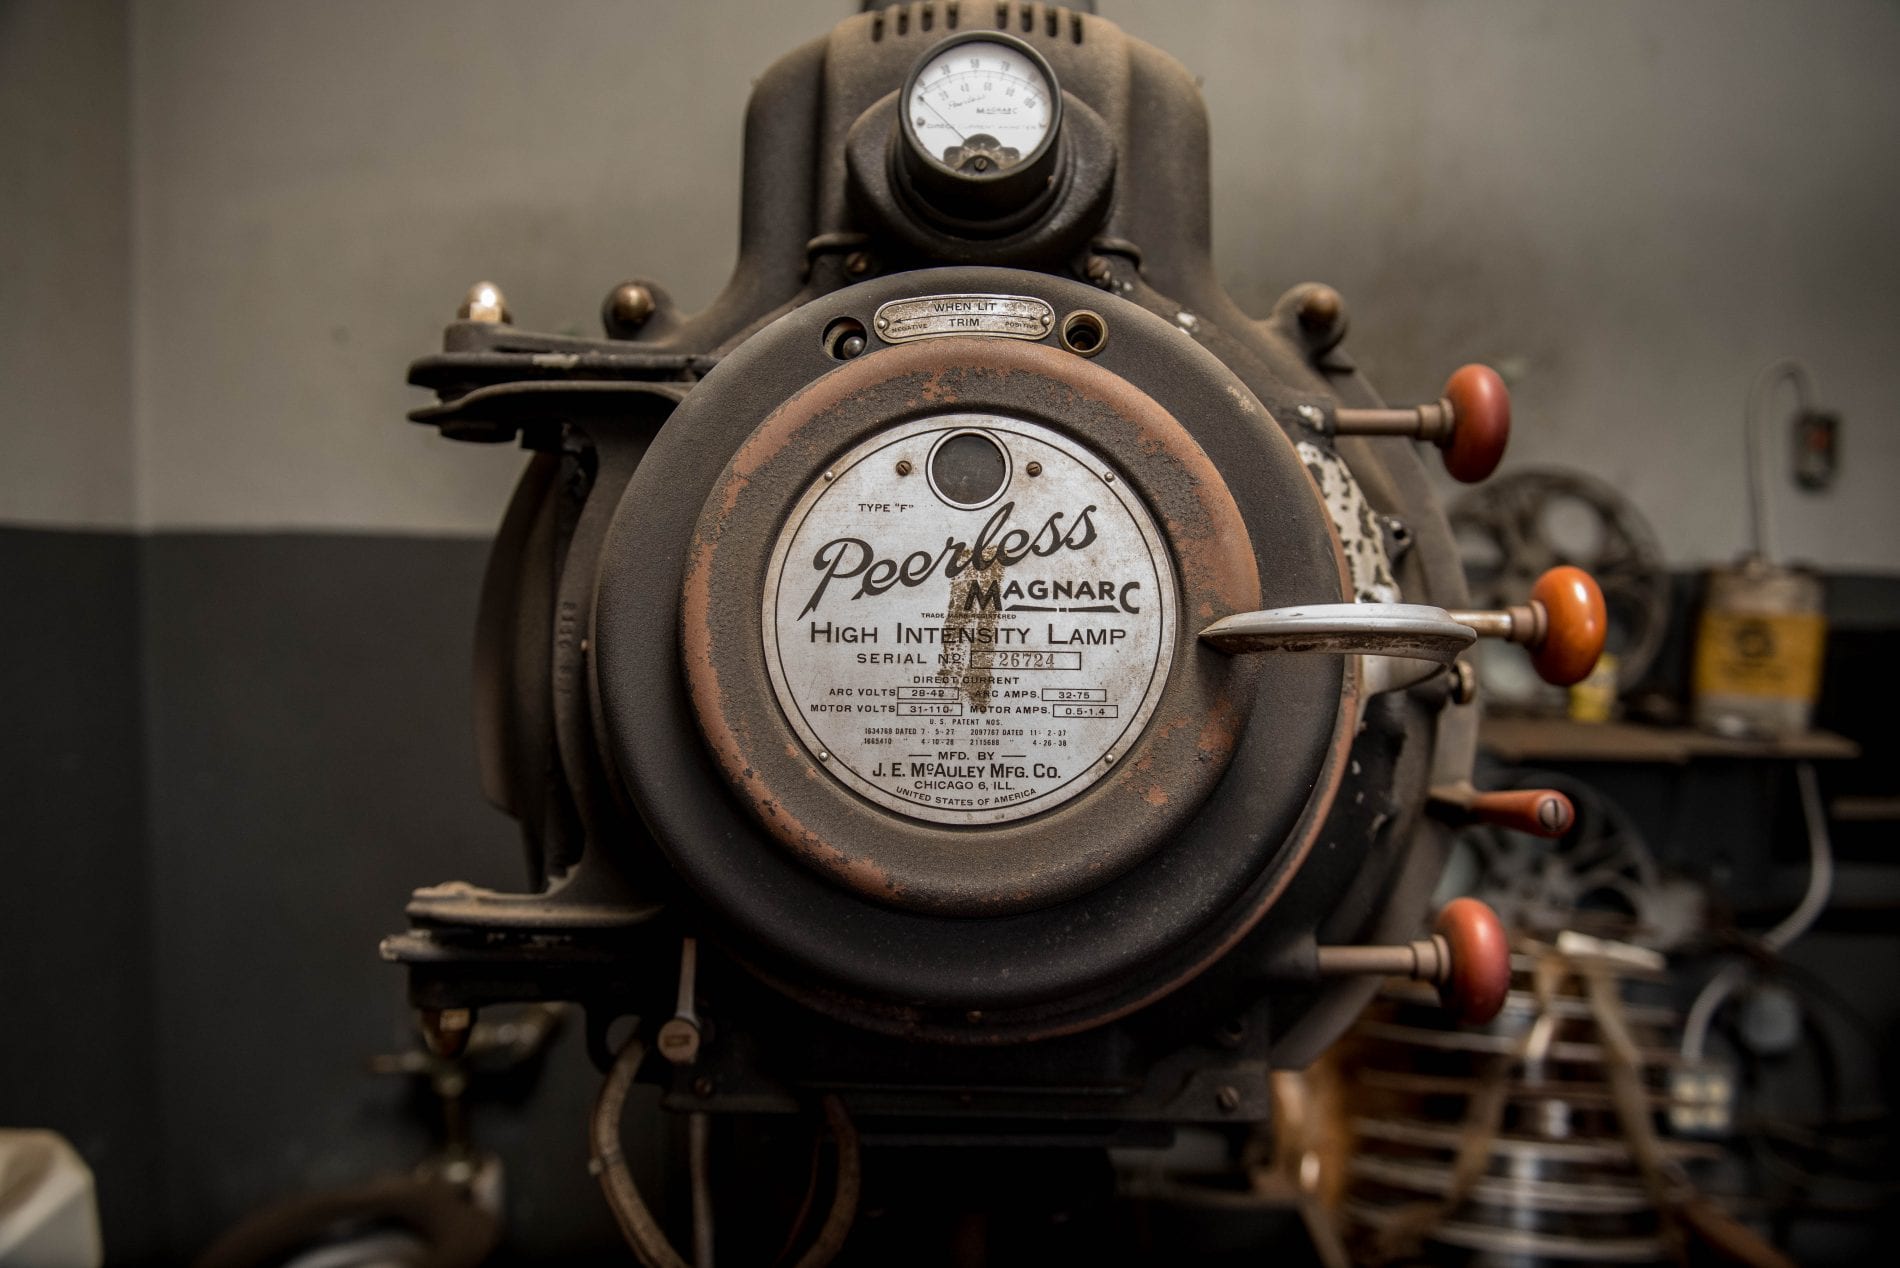
The Peerless Magnarc is a high-intensity carbon-arc lamp that was manufactured by the J. E. McAuley Company of Chicago Illinois. These lamps were used mostly in movie projectors and spotlights during the 1920s-1950s (and some are still in use). An extremely bright arc was created by passing a large DC current between two carbon rods, and the rods were consumed in the process. Since rods typically lasted 30 to 40 minutes, they needed to be replaced multiple times during the showing of a film. This required switching between two projectors, and so the burn time of the rod determined the maximum length of a movie reel.
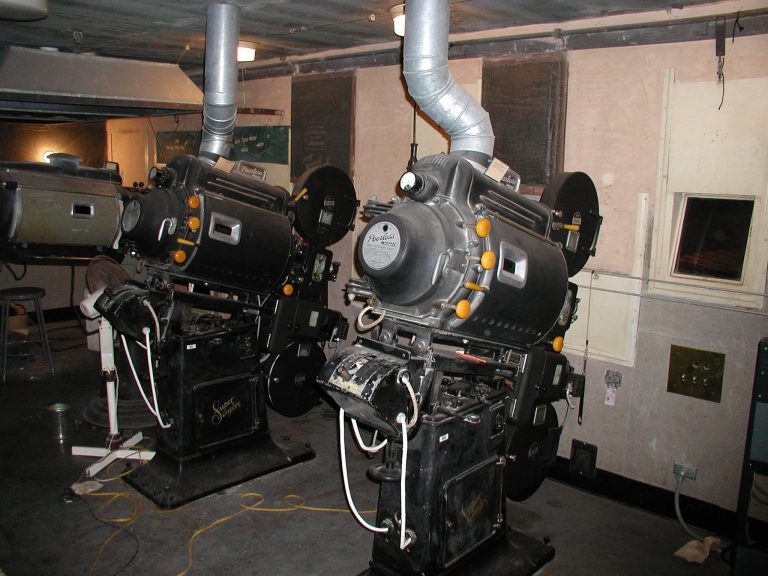
Carbon-arc lamps drew a lot of current, as can be seen by the scale on the ammeter. The top picture here shows a movie projector used at the Lincoln Theater in Bessemer, Alabama (https://alabamalincoln.com/). You can see, attached to the top part of the lamp, the same meter used in this project. The label on the lamp in the picture indicates a rating of 28-42 volts DC and 32-75 amps. That corresponds to a maximum power of 3150 watts — equivalent to 30 100-watt lightbulbs! The single meter measured the current draw of both the lamp and the projector motor. The motor consumed an additional 1000 watts or so. The bottom picture shows projectors in operation during the 1940s at the Ritz Theater in Preston, Lancashire, England (https://pavilioncinema.co.uk/frankensteins-workshop/). Again, you can see the ammeter on the lamp housing. Note the large chimneys needed to duct away the vapor and the tremendous heat created by the burning arc lamps!
It is difficult to determine exactly when this meter was manufactured, since there is no build date. The label on the lamp in the picture from the Lincoln Theater indicates patent dates of 1927-1938. It is most likely that the meter was manufactured during the 1940s, which was the most popular period for these lamps. The Lincoln Theater was built in 1948, but it is not known if the projector was new at that time, or was purchased used.
How to use the gadget
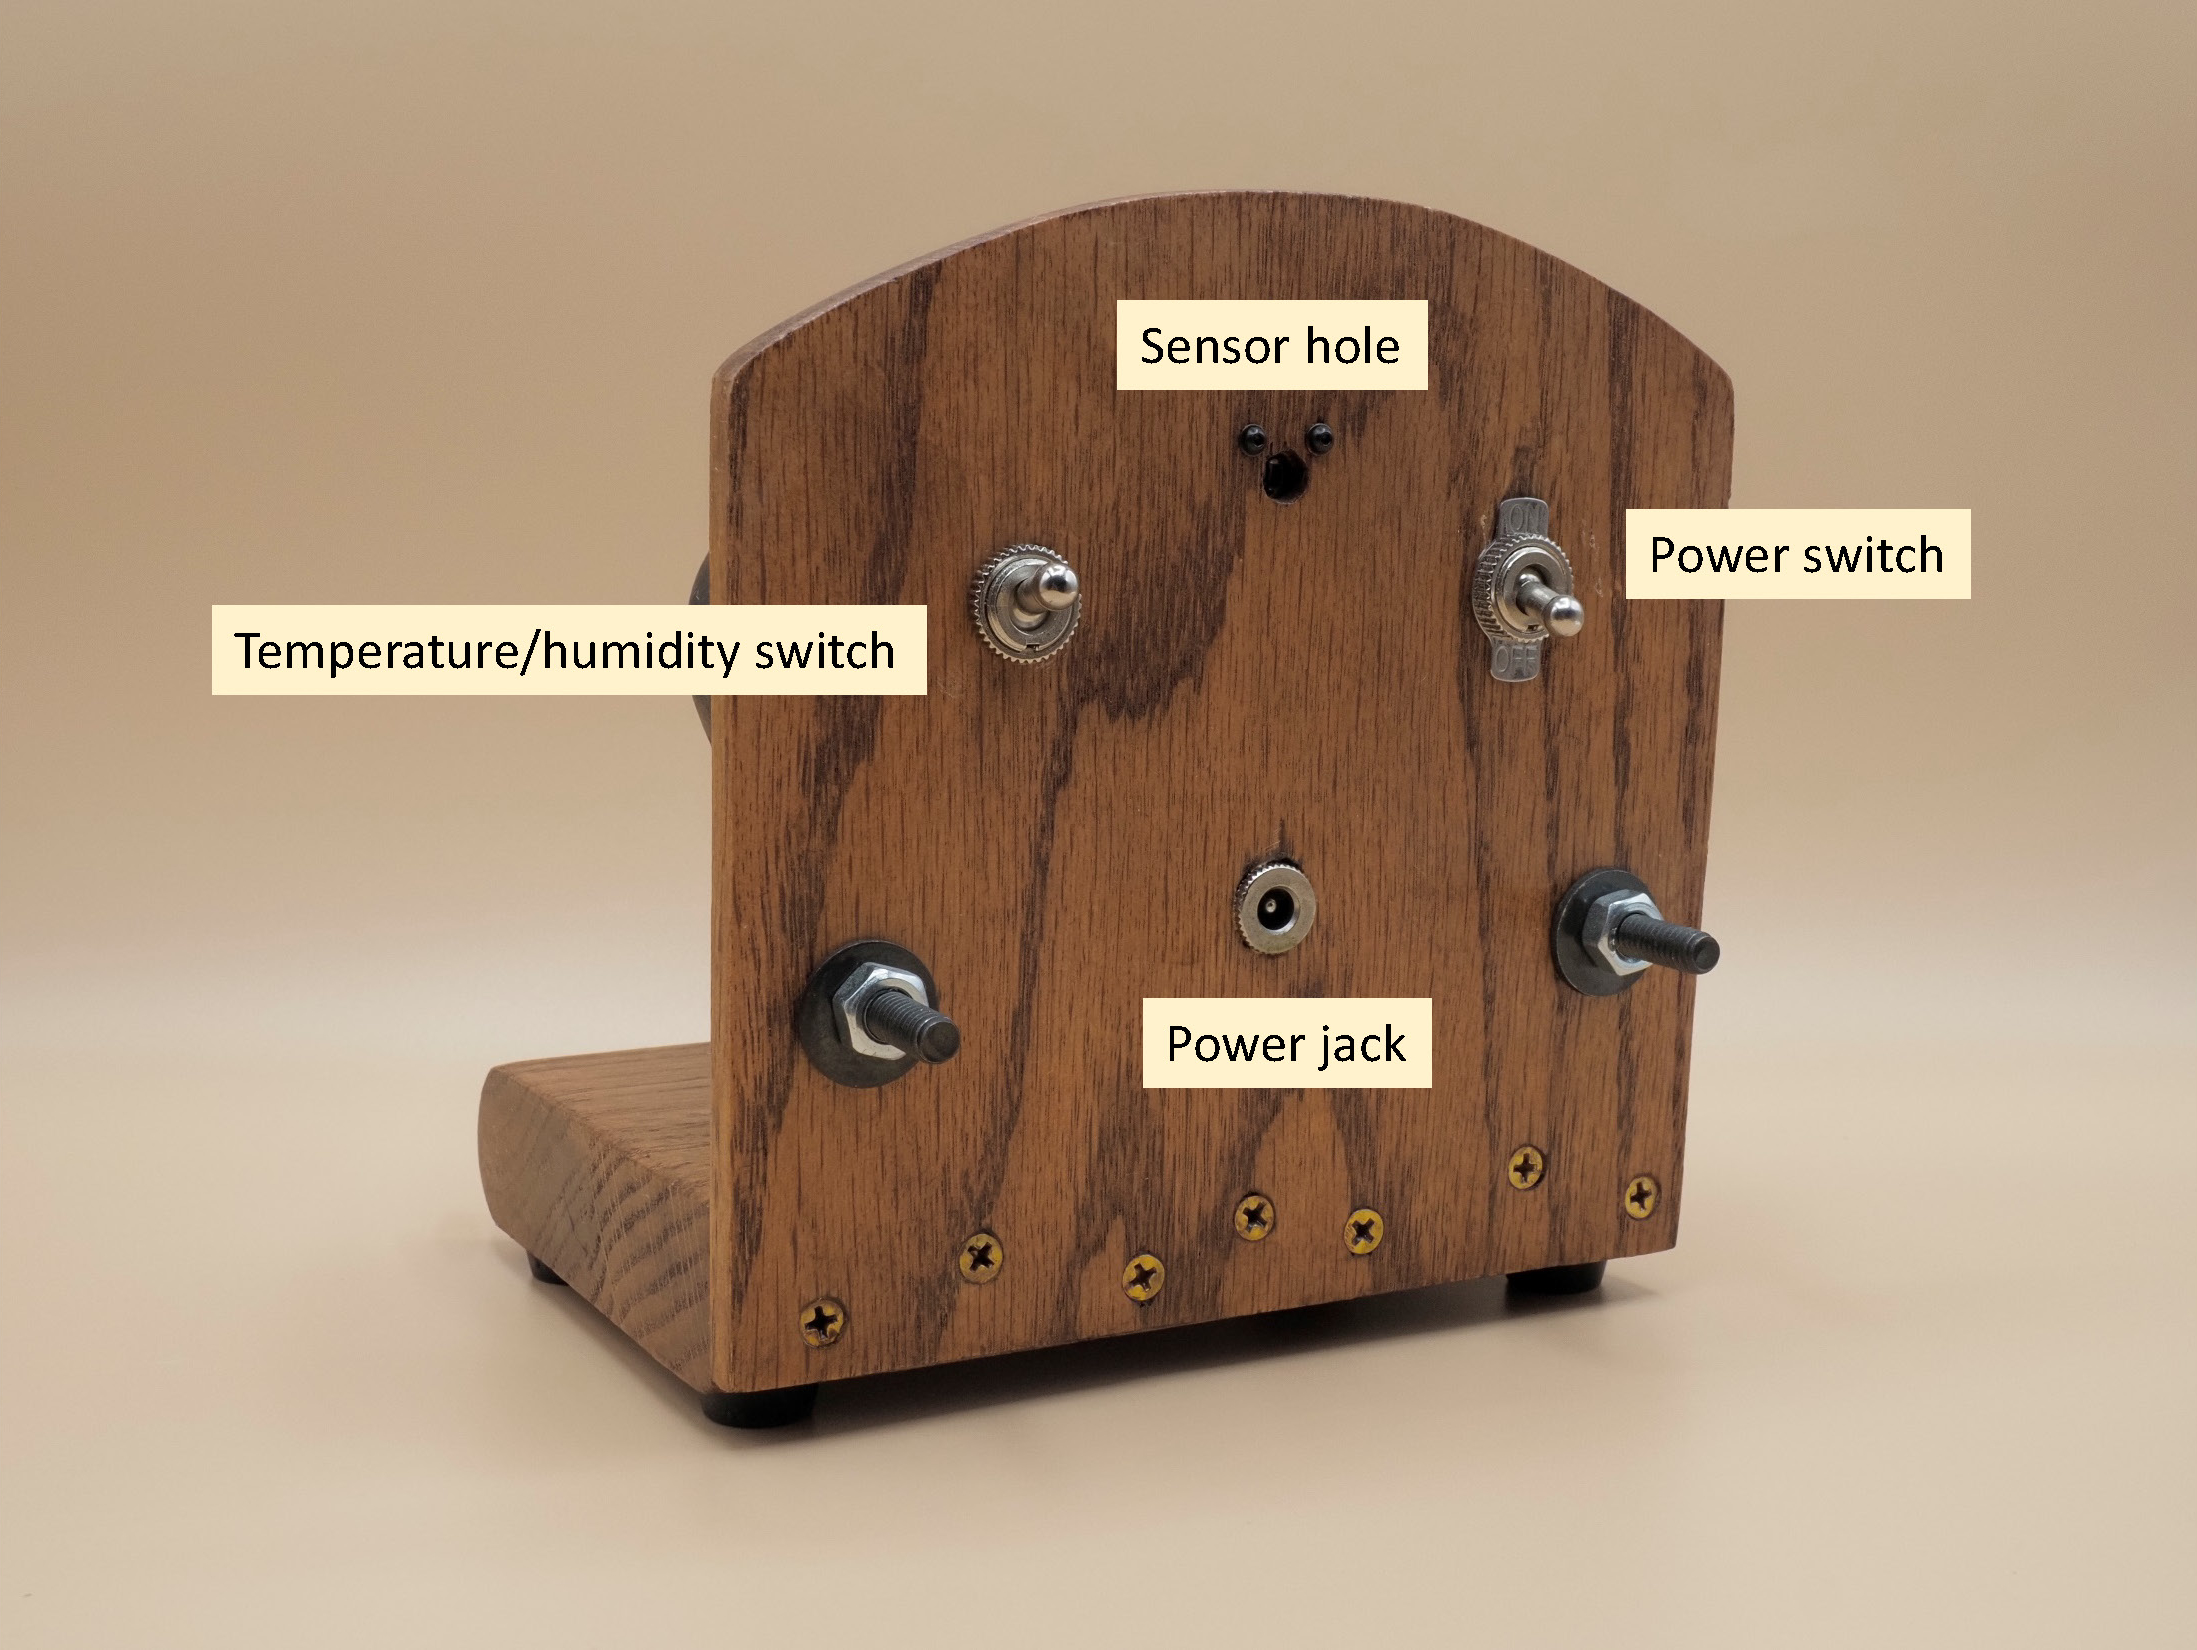
This gadget is extremely easy to use. On the back side you’ll find the power jack, two toggle switches, and the hole that the sensor sits behind. Start by connecting a 9V power supply to the power jack (see below). Then turn the power switch to the “on” position (up). The other switch toggles between measuring the temperature and the humidity. Place the switch up to measure humidity, and down to measure temperature. If you forget which setting to use, breathe into the sensor hole. This raises the humidity quite a bit, without raising the temperature much. If you see the needle go up towards 100%, you know that the setting is on humidity.
Care and feeding
You must power the gadget using a 9V DC power supply with a standard 2.1mm center-positive connector. Any supply with a current rating of 1A or higher should be fine (see picture). These power supplies are ubiquitous — just search for “9V arduino power supply” on Amazon or any other web commerce site and you will find numerous vendors. Just make sure the supply is 9V center-positive, or you will damage the controller. You can also find nice extension cords for these power supplies, as shown in the picture.
Clean the gadget as you would any appliance. You can use glass cleaner on the meter glass, but be careful! The glass on any one of these these meters may be loose, and if you press too hard you may dislodge it.

Reading the meter
The scale of this meter was originally designed to display current in the range 10-110 amps. I have calibrated the output of the controller so that the same display indicates either temperature in the range 10-110 degrees Fahrenheit, or relative humidity in the range 10-100%. In the picture shown here, the reading is either 72 degrees, or 72%, depending on whether the switch is set to temperature or humidity.
Note that when you first turn on the gadget, or when you throw the temperature/humidity switch, the needle on the meter will swing through its full scale. This is to let you know that the meter is working properly. Often during the summer the temperature and humidity readings are very close, and if the needle changes only slightly you may wonder if the gadget is actually working.
Accuracy
This gadget uses a high-precision Silicon Labs Si7021 sensor. Nevertheless, this is not a laboratory instrument, and you should not expect highly accurate readings. My guess is that the temperature should be good to about 2 degrees, and the humidity to about 5%, over the expected indoor range of readings. See the section below on the gadget operation for more information about accuracy.
Longevity
This Magnarc ammeter is probably 80 years old, at least. Some of the meters in my projects are more than 120 years old, and amazingly, they still work. Most old meters are very well constructed and were designed for continuous use over a long haul. I hope that the Magnarc meter has many more years of useful service in its future, but there’s no way to tell when it might crap out. If it stops working, at least the meter is a beautiful antique worth displaying!
How the gadget works
The Magnarc meter was designed to display a large amount of current. It did this by passing most of the current through an internal shunt, and only allowing a small trickle to pass through the sensitive meter itself. I removed the shunt and installed a Silicon Labs Si7021 high-precision temperature/humidity sensor into the housing. The sensor is actually mounted to the wooden upright, with the detector placed against a hole to allow access to the surrounding air. The sensor has a manufacturer-rated accuracy of +/- 1 degree Fahrenheit, and +/- 3% relative humidity. Readings are taken using an arduino nano and displayed on the meter using a simple resistor voltage divider against the internal resistance of the meter. The voltage is controlled using PWM on a digital pin. These old meters are notorious for being both nonlinear and out of calibration, so I calibrated the meter through its range by using a 4th-order polynomial to best-fit the measured temperature or humidity to displayed current. In practice, considering the accuracy of the sensor and the age of the meter, I would expect the displayed temperature to be accurate to about 2 degrees and the humidity to around 5%. I would also expect that over time the performance of the meter will degrade and drift a bit. Even so, I wouldn’t be surprised if the more probable failure point is the solid-state arduino controller rather than the mechanical ammeter!