What it does
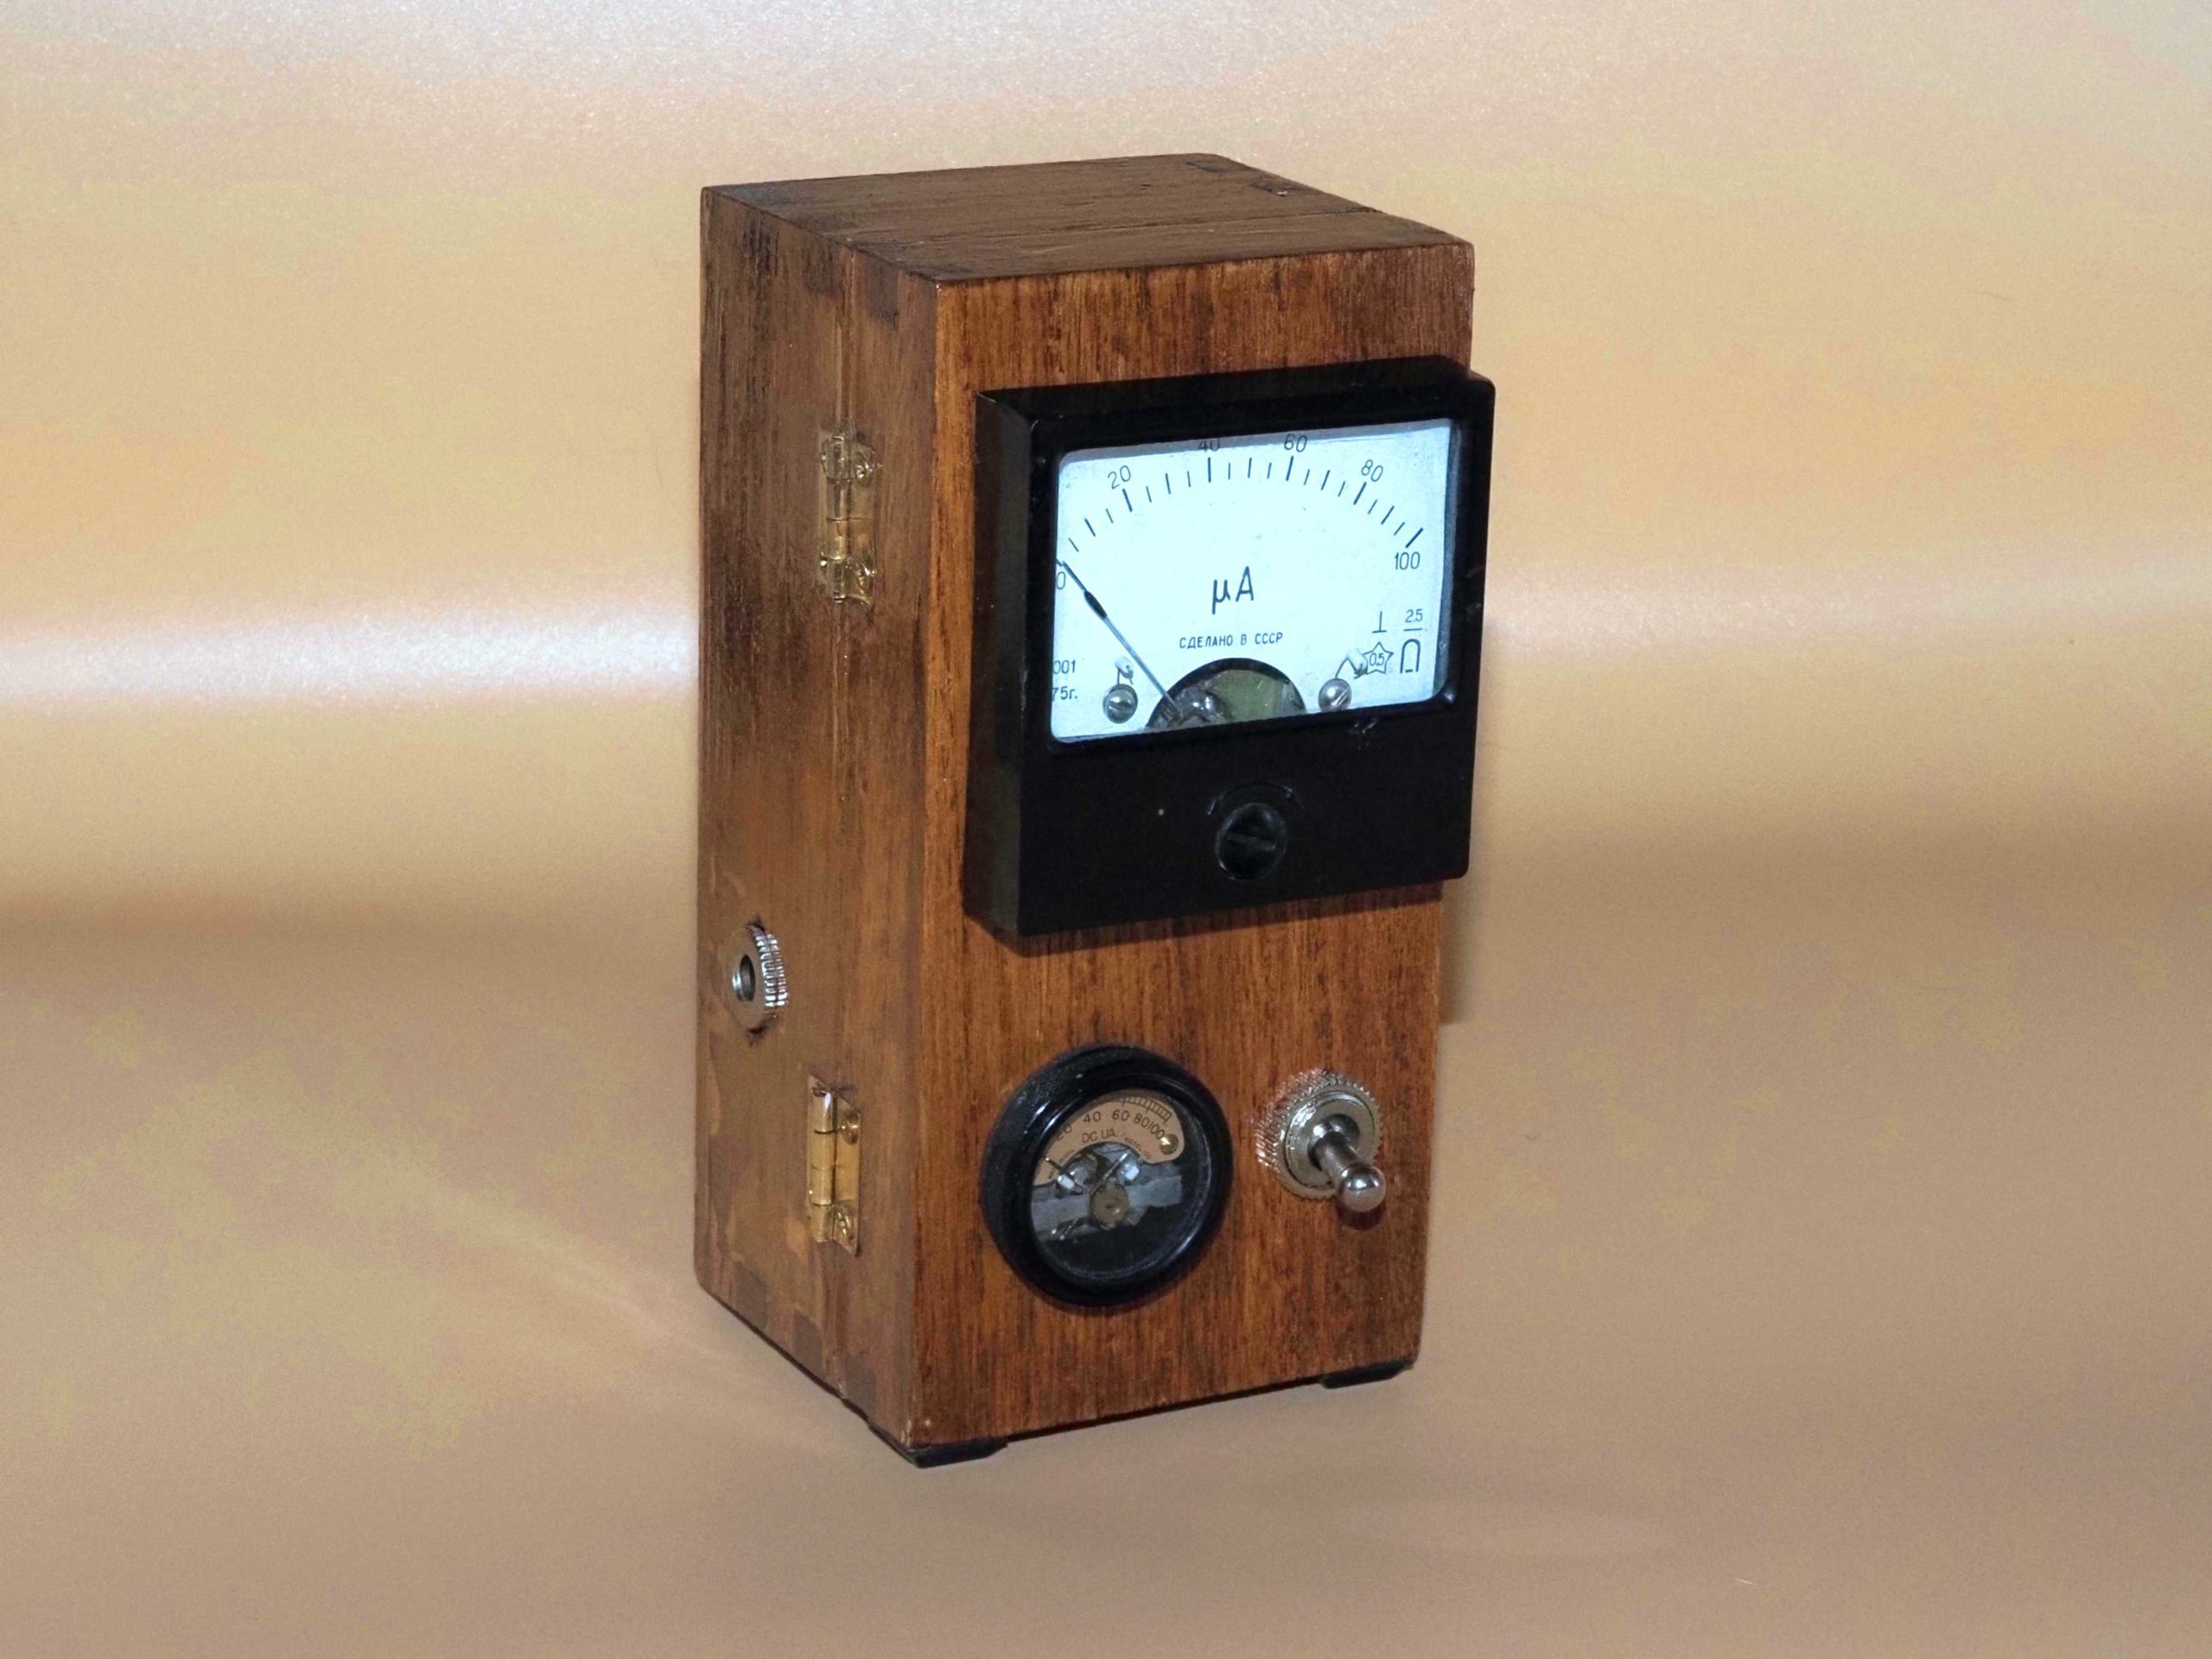
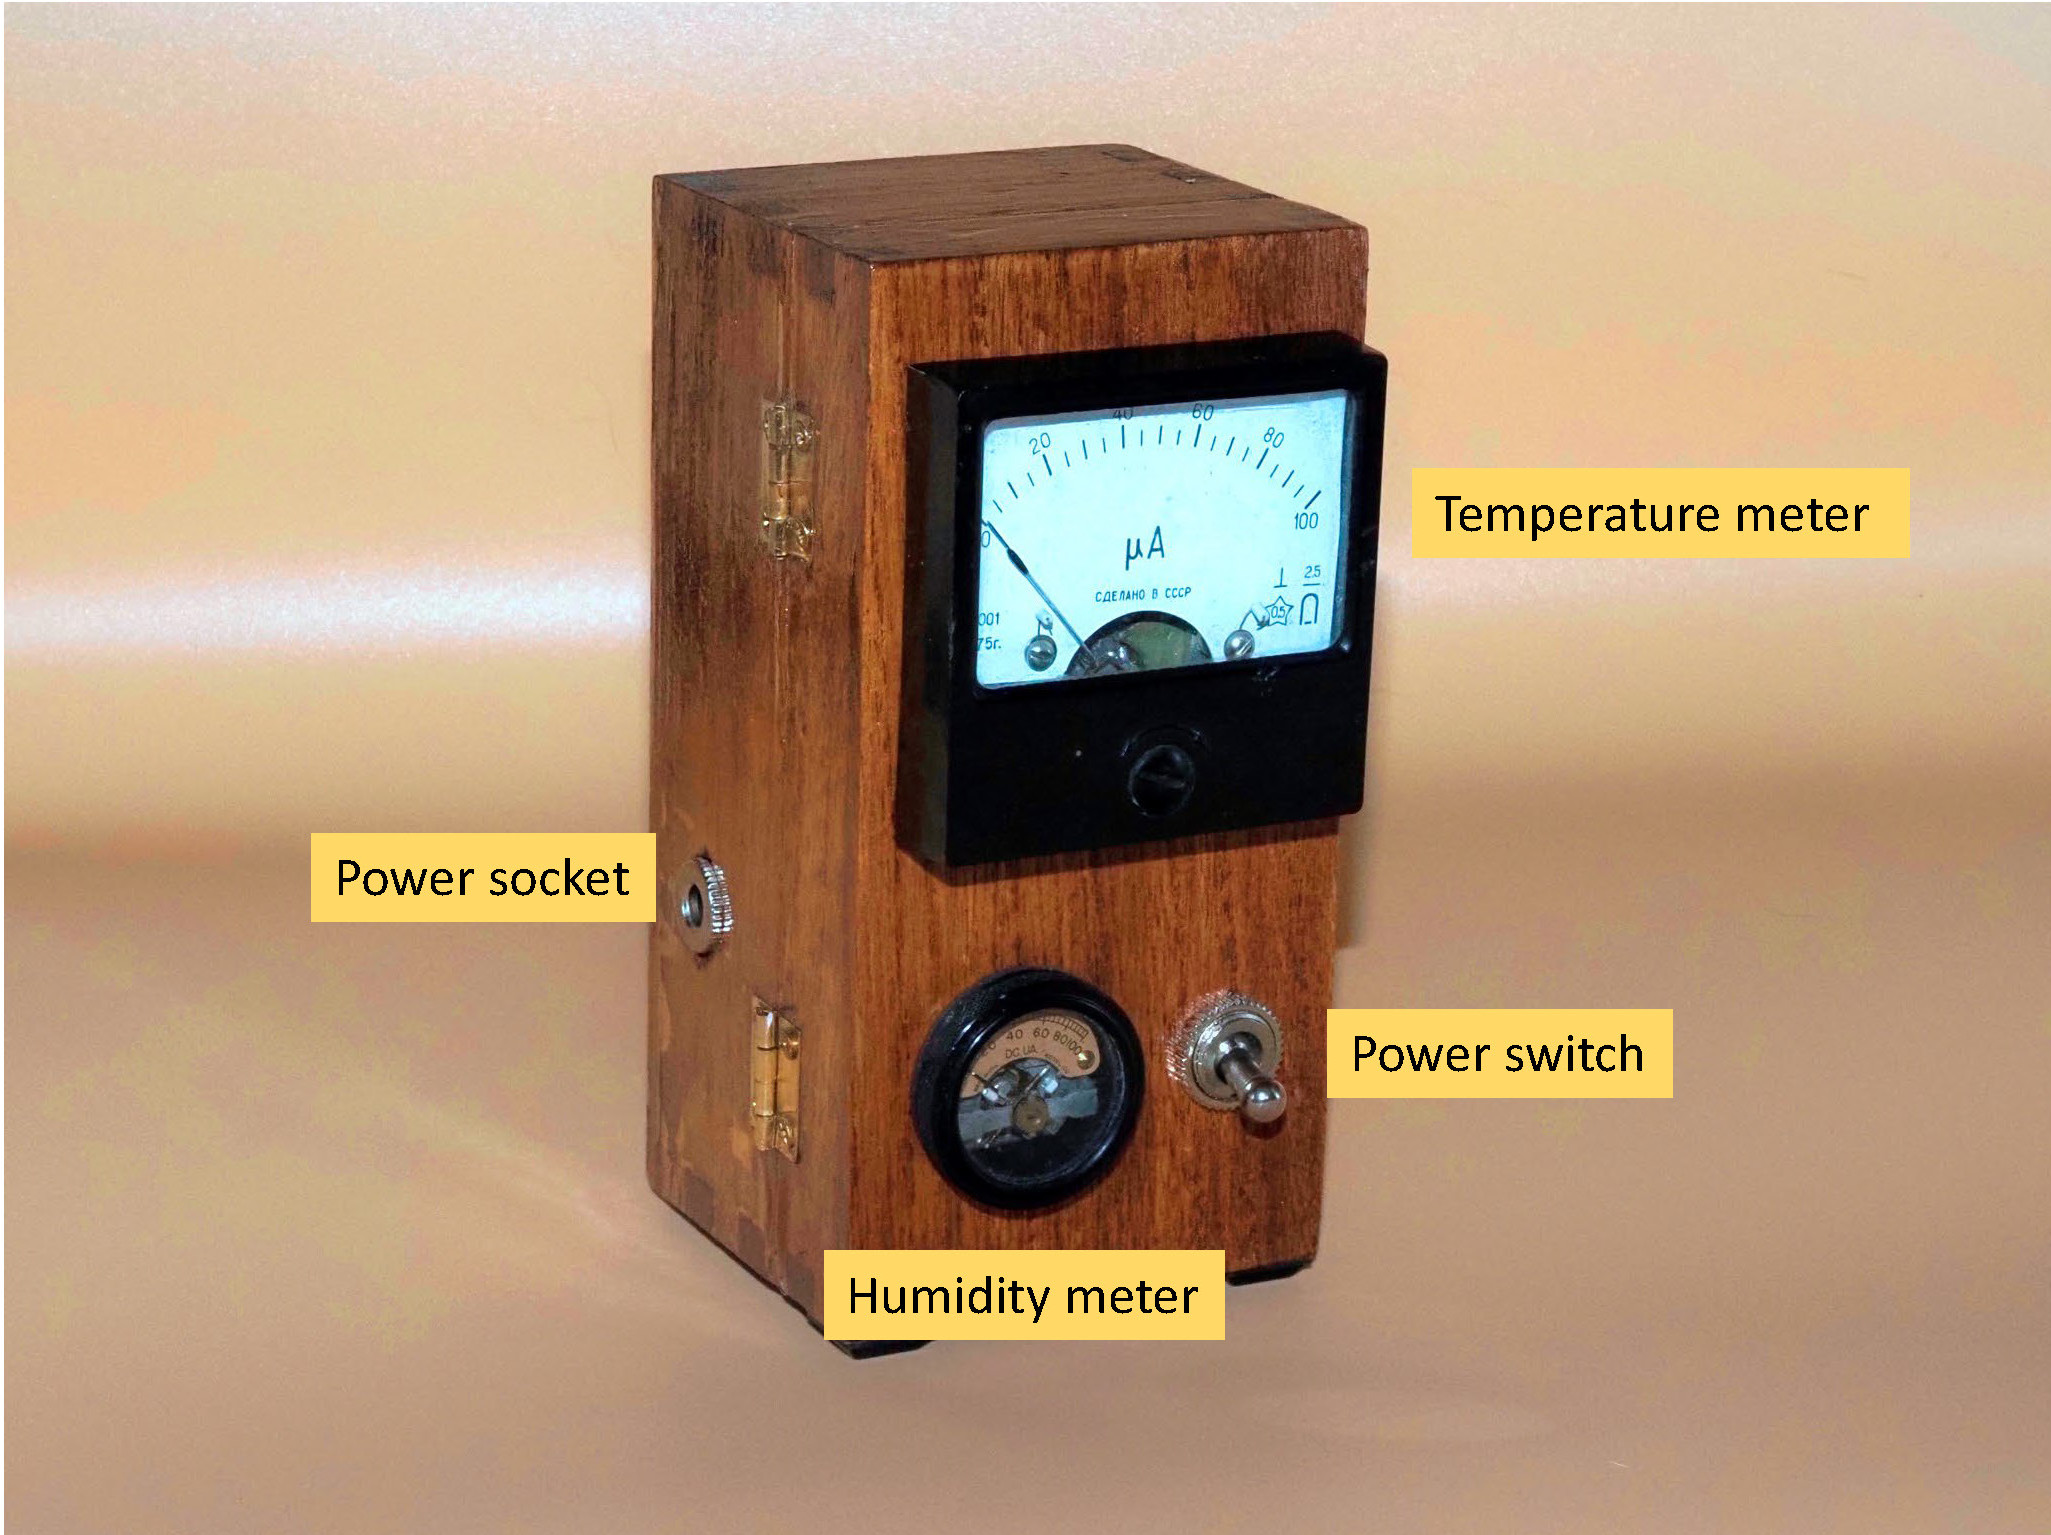
This gadget uses a sensor to measure the indoor temperature and humidity. The temperature reading is displayed on a Soviet microammeter and the humidity is displayed on a tiny MB microammeter.
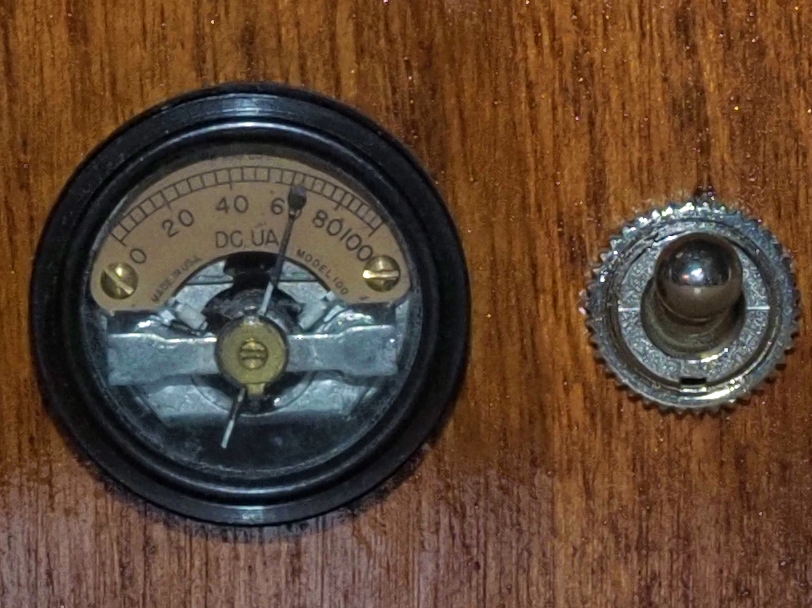
About the MB meter
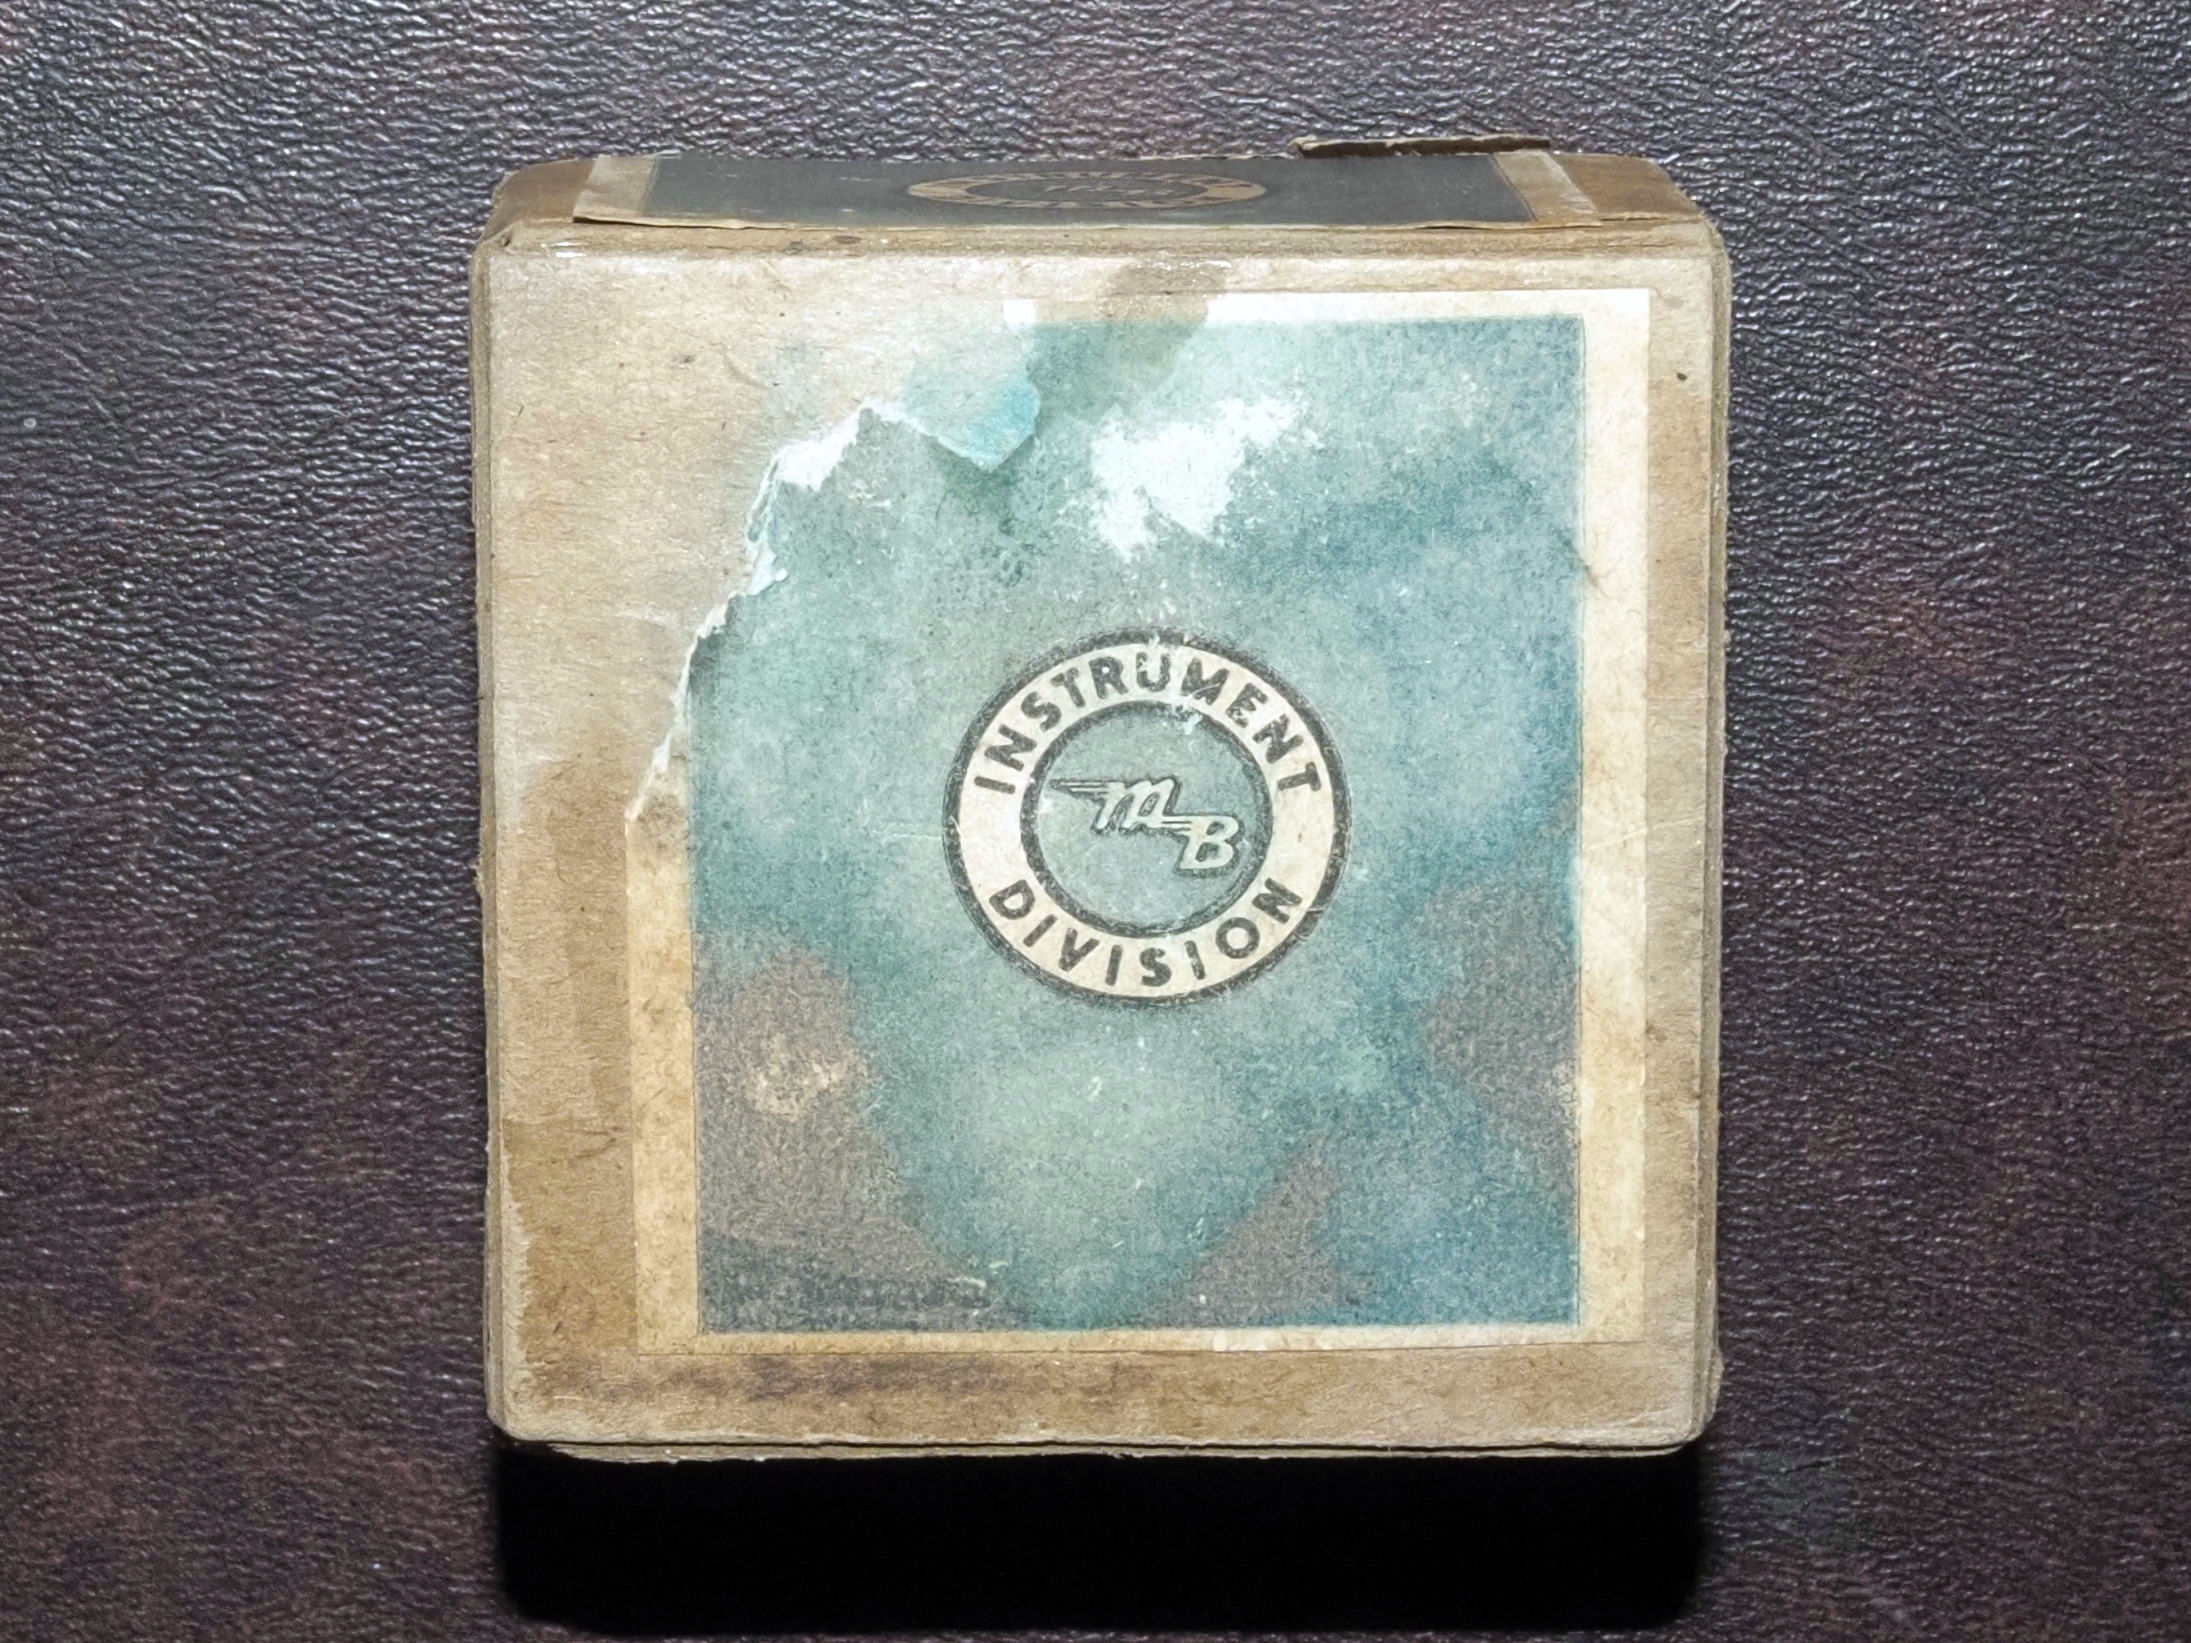
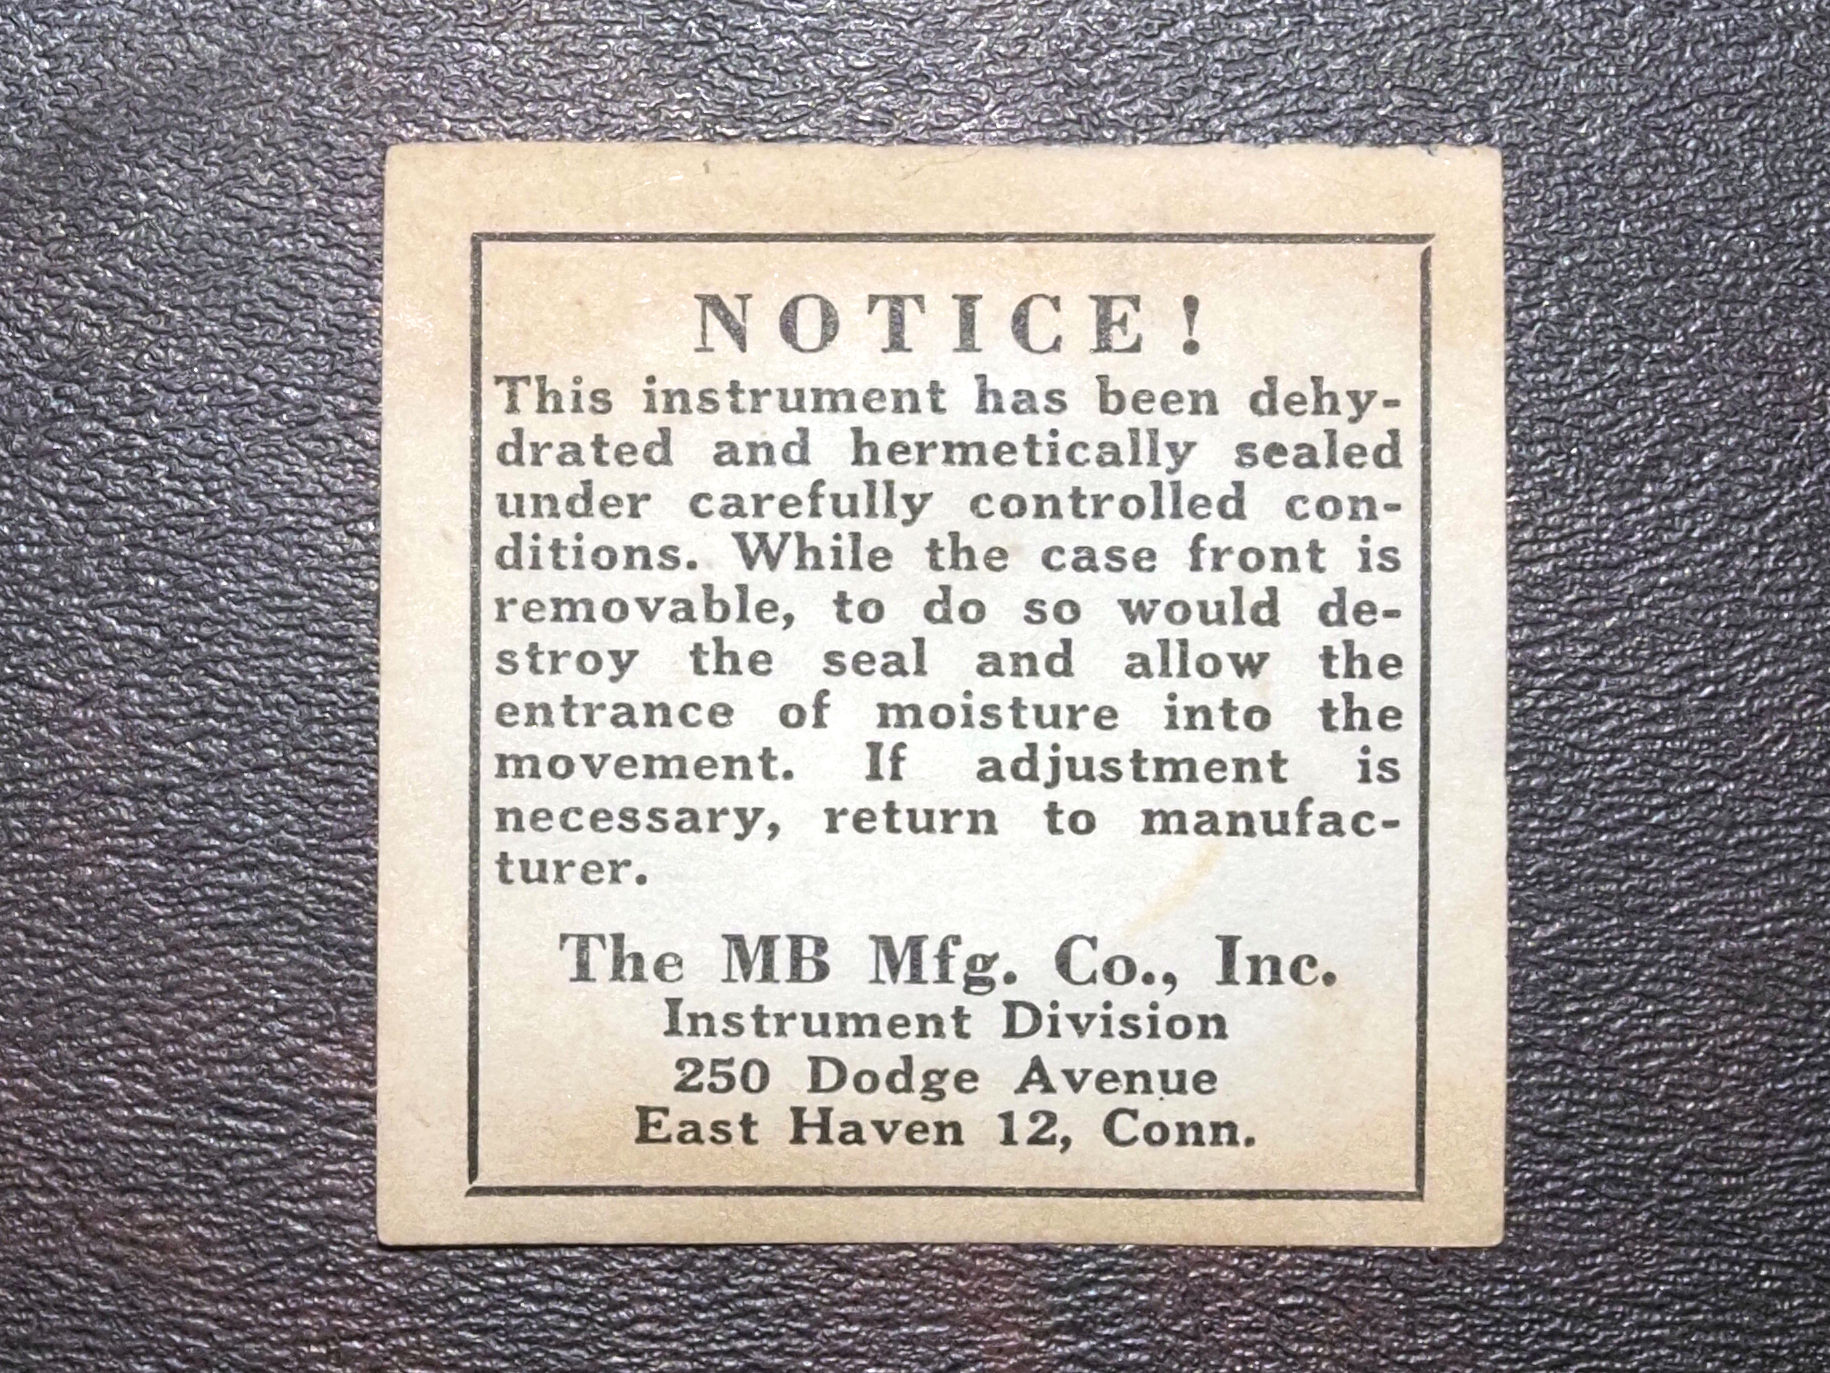
The small microammeter was made by MB Manufacturing. I have never seen another like it, especially given its tiny size. The paper note from inside the box gives the address of the company as 250 Dodge Avenue, East Haven 12, Conn. That particular MB building was built in 1942 adjacent to the Tweed New Haven Airport, and is still in use as an industrial building. Because the address lists the city zone code, the meter was probably shipped between 1943, when the zone codes were first implemented, and 1963 when they were replaced by zip codes.

MB Manufacturing was founded by the Mettler Brothers in New Haven, Connecticut, in 1938. It produced a number of products for the aircraft industry, and became a fairly large manufacturer of electronics, particularly vibration testing equipment. The trade publication Sound and Vibration published an article in April 2014 (http://www.sandv.com/downloads/1404lang.pdf) with a nice history of the company. The abstract to the article states
A nearly forgotten four-employee machine shop in the shadow of New Haven’s Yale University probably gave birth to America’s vibration testing industry. Mettler Brothers (MB) Manufacturing established in 1938 by George and Rollin Mettler initially fabricated precision metal components for nearby aircraft engine giant, Pratt & Whitney. As America was forced to immerse itself in the production of war material, MB grew in size and technical stature by specializing in answering the dynamic testing needs of our rapidly evolving aircraft industry. The company emerged as MB Electronics and grew to more than 700 employees. It invented, perfected and marketed a broad range of products, including electrodynamic shakers, large power amplifiers, sine and random controllers, velocity sensors, accelerometers and isolation materials. In its waning days, MB Electronics spawned many pillars of our modern vibration testing world including Unholtz Dickie,
Vibra-metrics, BB&K, ACG, VSS, MB Dynamics, Ling Calidyne, the Tustin Institute and one terrific college dean.
About the Soviet meter
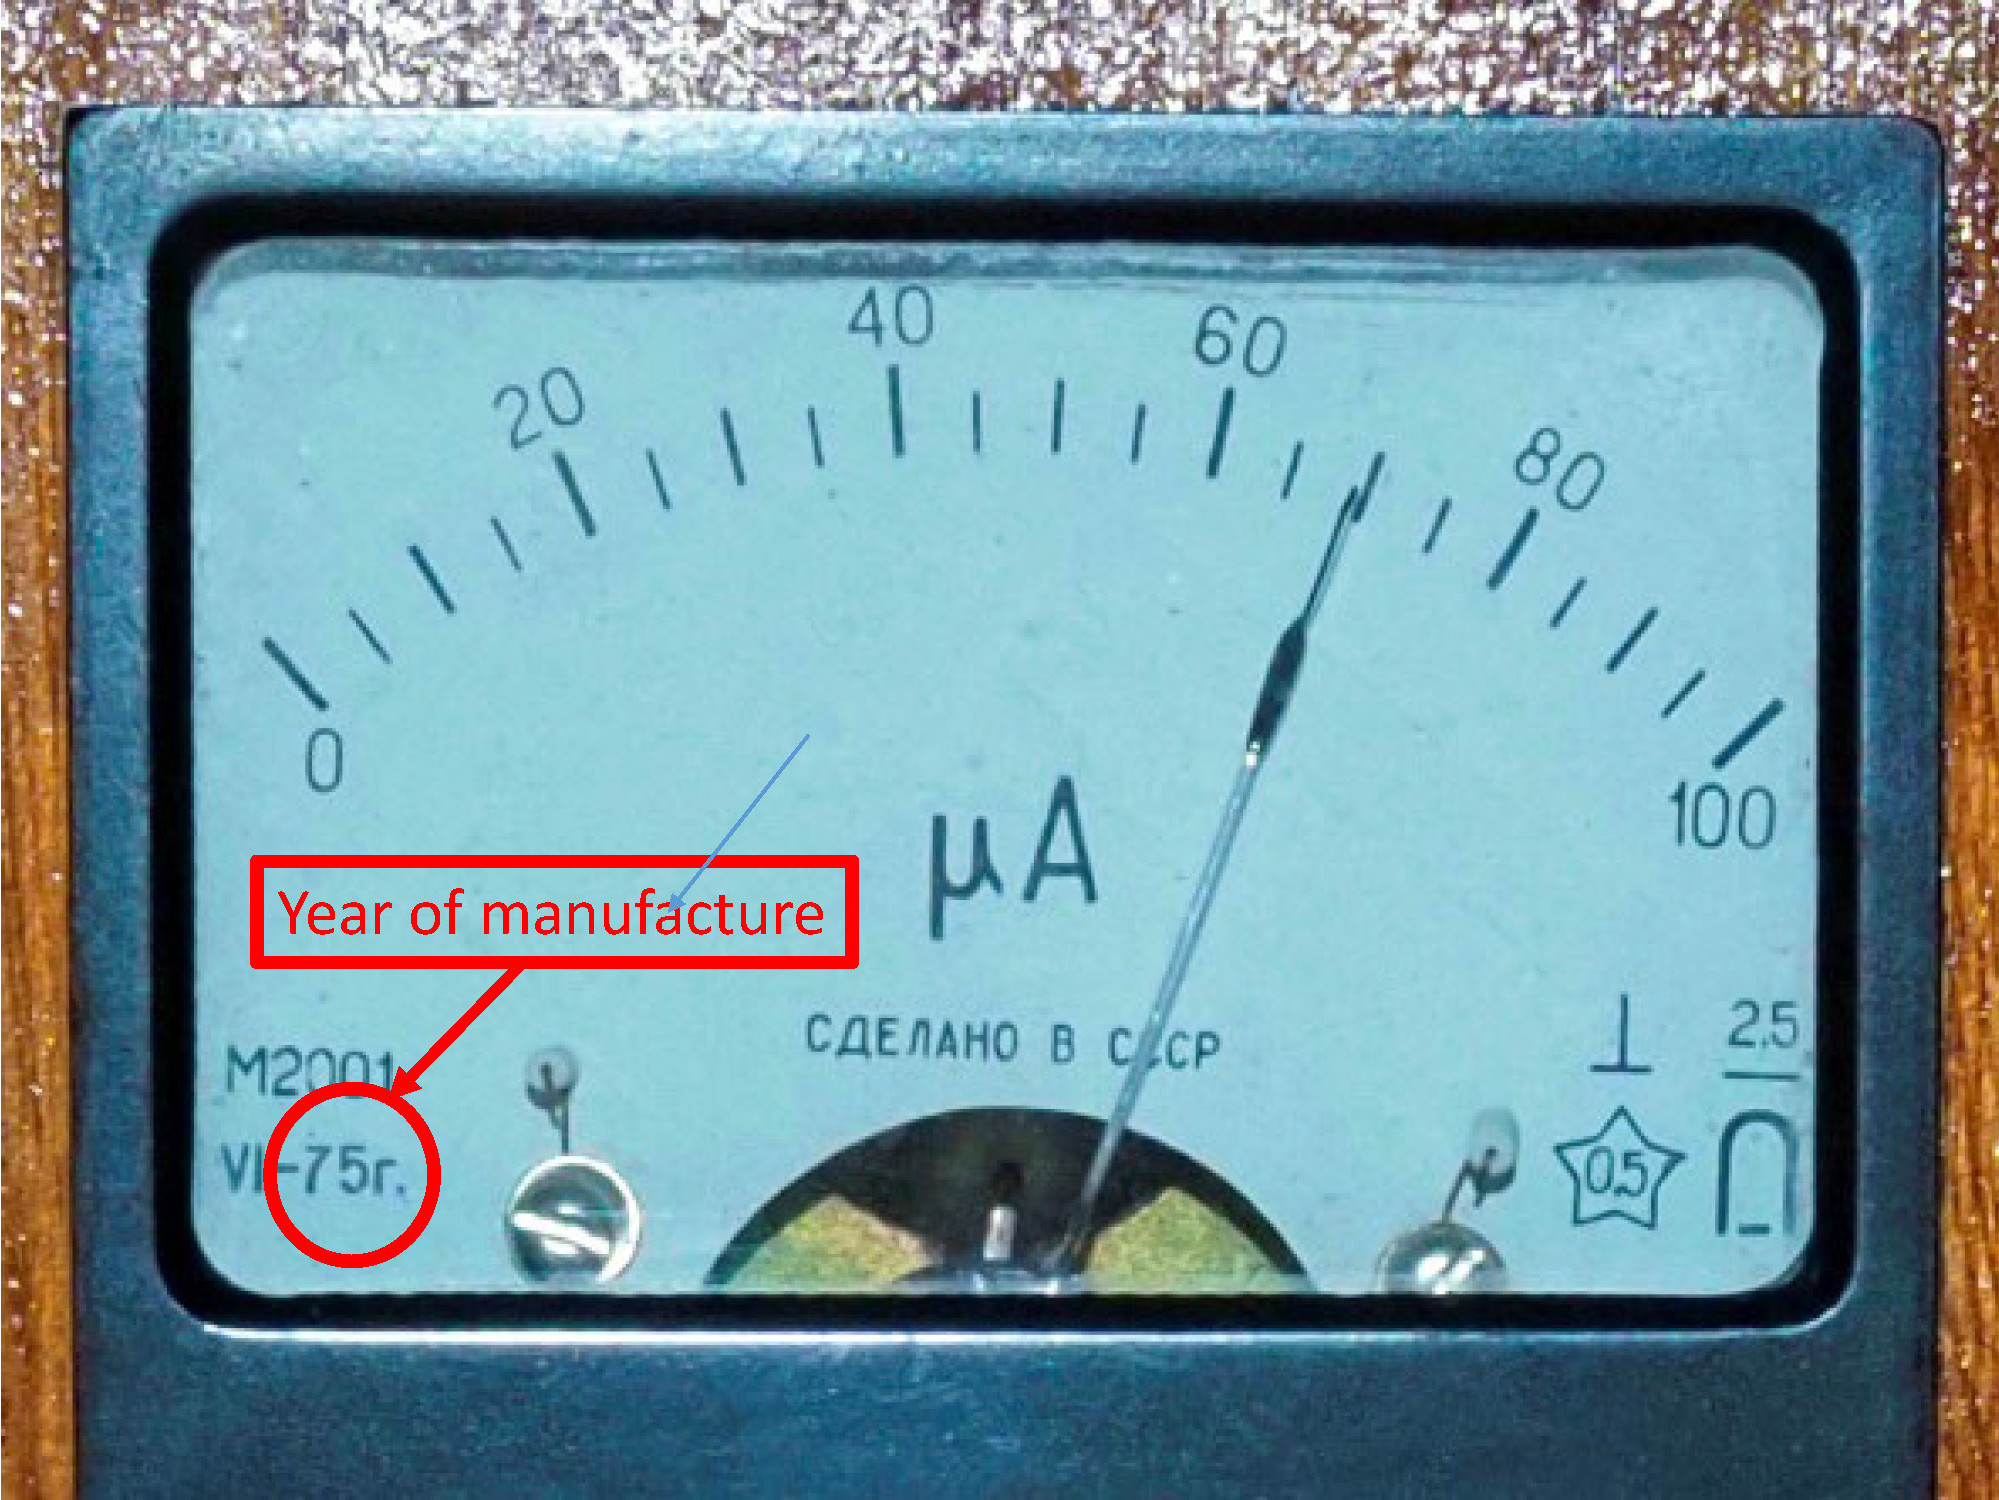
The large microammeter was manufactured in the USSR in 1975. The manufacture date for Soviet meters is usually given on the meter face. The symbols on the lower right are standard markings: vertical mounting, permanent magnet moving coil, DC with 2.5% accuracy, and testing done at 500 V (0.5 kV).
How to use the gadget
This gadget is very easy to use. The power jack is located on the left side. Start by connecting a 9V power supply to the power jack (see below). Then turn the power switch to the “on” position (up). The top meter will then display temperature, while the bottom meter displays humidity.
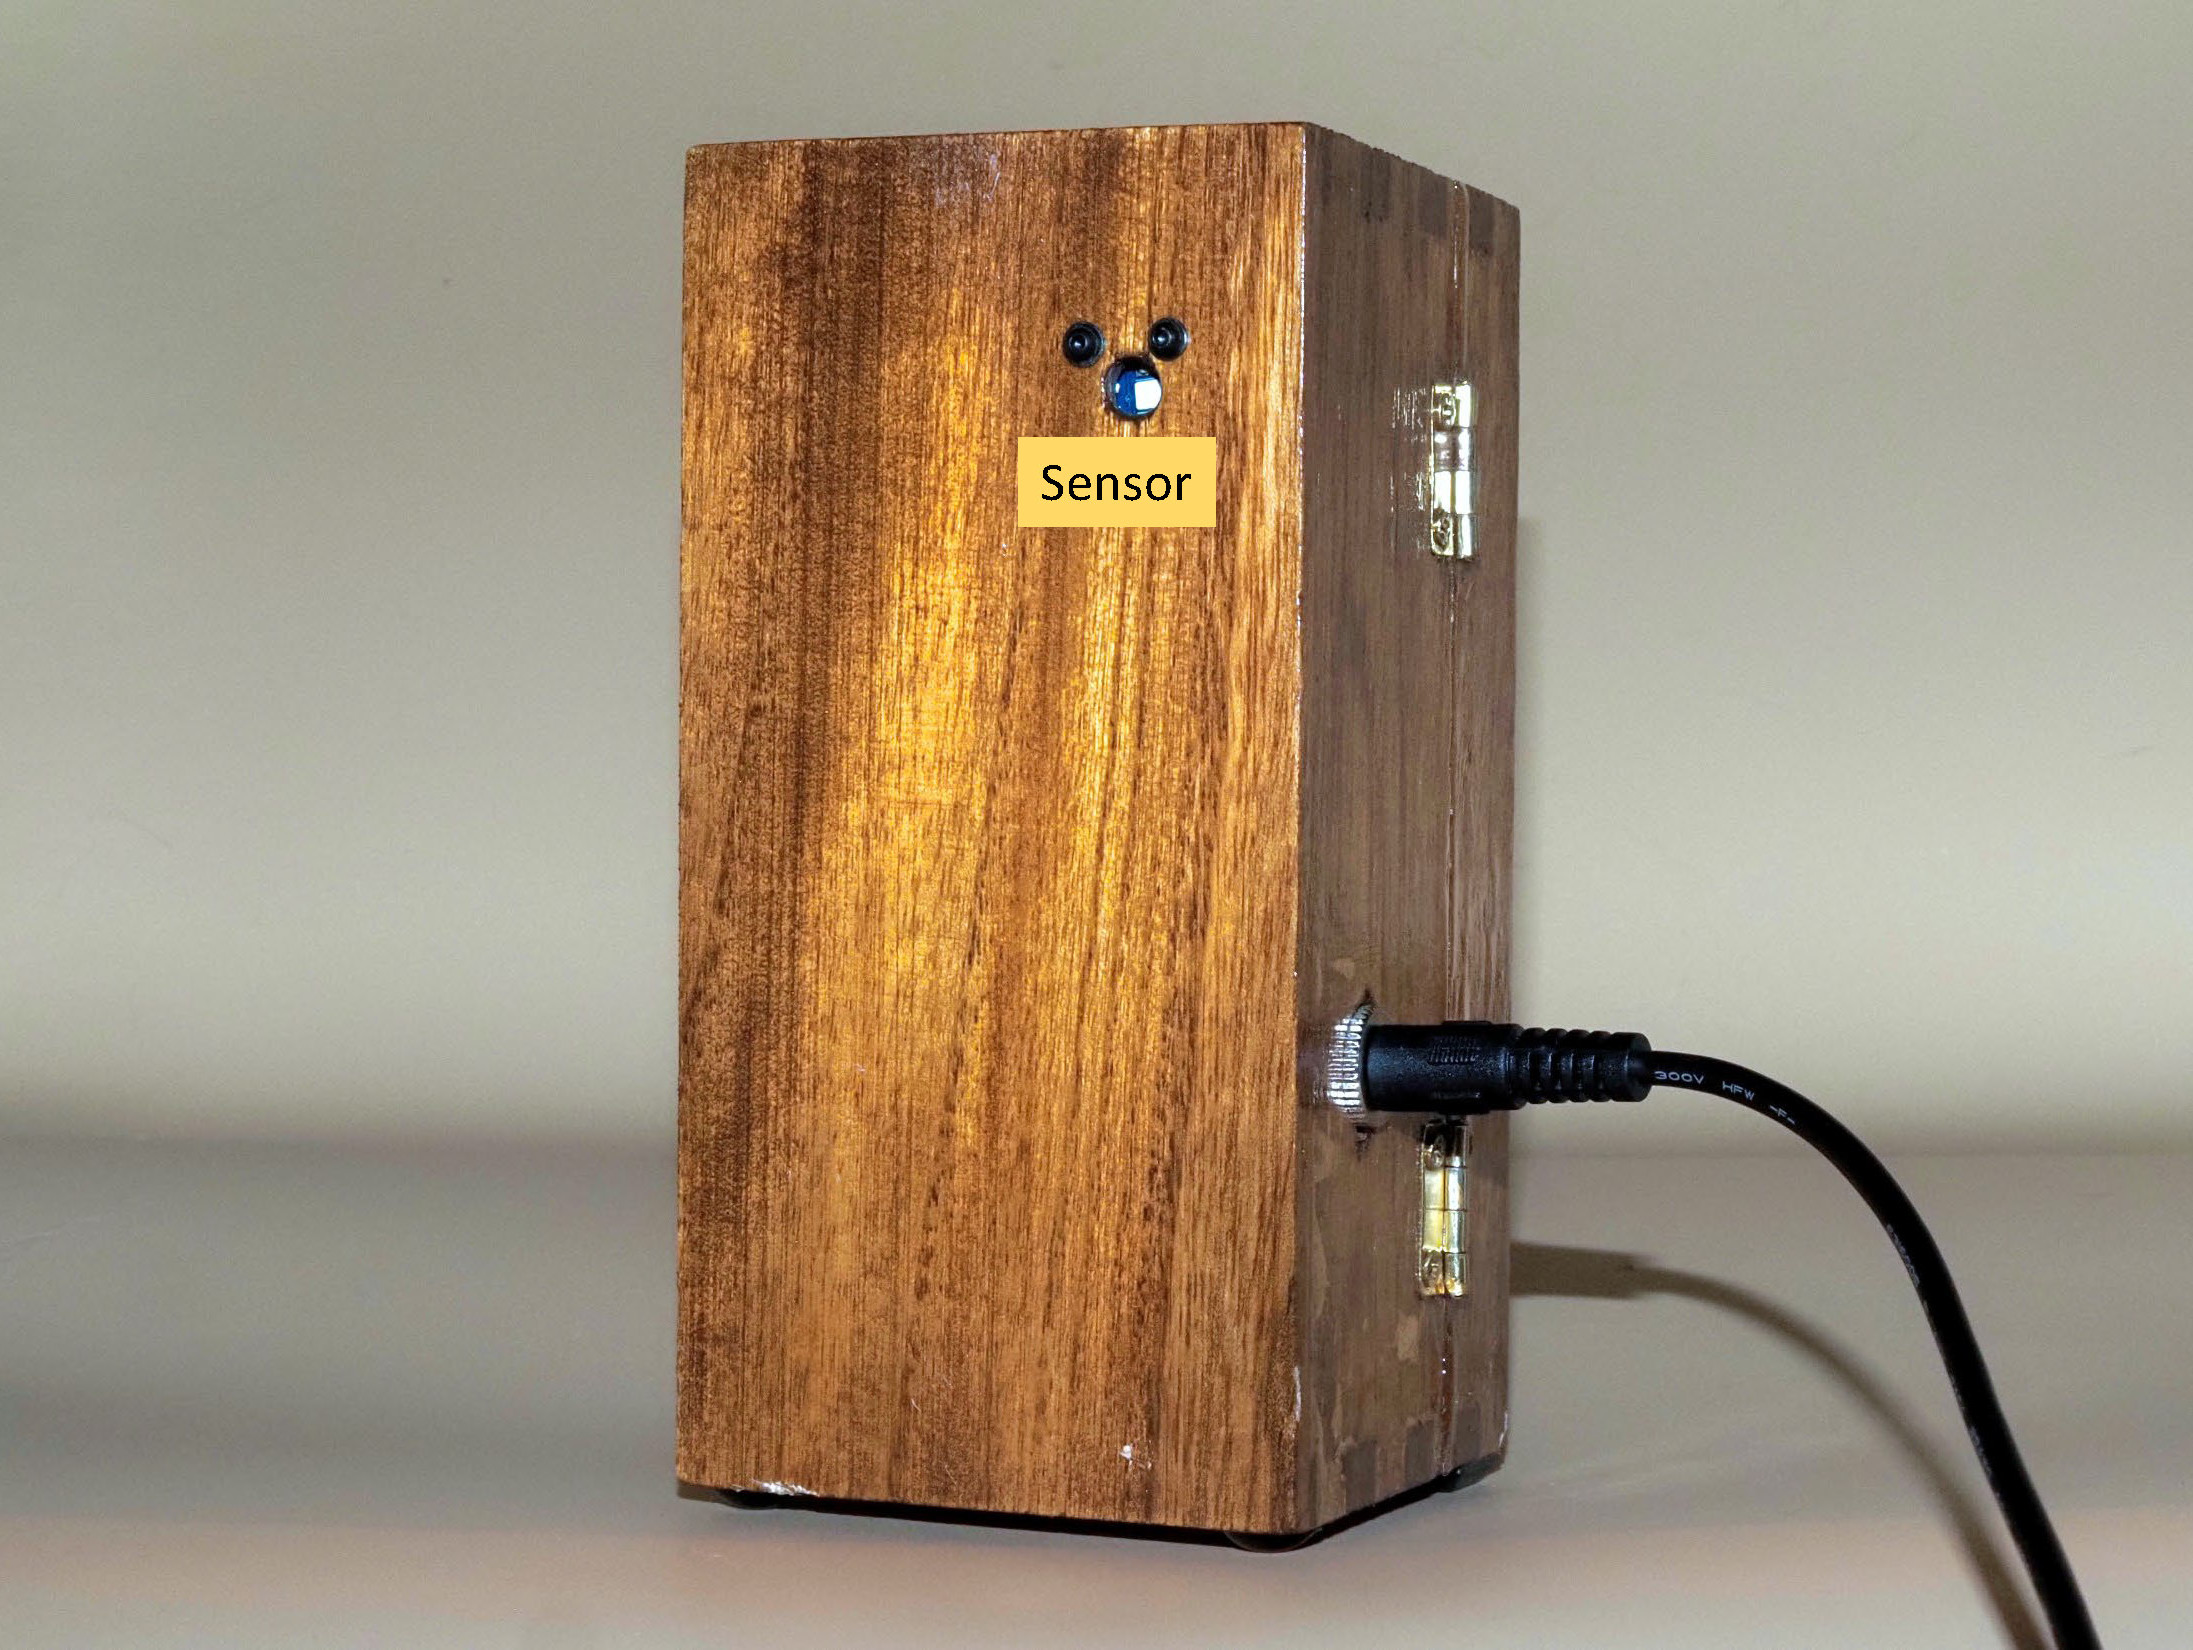
The sensor is located on the back of the unit, behind a hole. You can see the sensor through the hole. Be sure not to block the hole since the sensor needs access to the air surrounding the unit. If you’ve forgotten which meter displays the humidity, just breathe into the sensor hole. This raises the humidity quite a bit, without raising the temperature much. You will see the needle of the bottom meter go up towards 100%, and thus know that the bottom meter displays the humidity.
Care and feeding
You must power the gadget using a 9V DC power supply with a standard 2.1mm center-positive connector. Any supply with a current rating of 1A or higher should be fine (see picture). These power supplies are ubiquitous — just search for “9V arduino power supply” on Amazon or any other web commerce site and you will find numerous vendors. Just make sure the supply is 9V center-positive, or you will damage the controller. You can also find nice extension cords for these power supplies, as shown in the picture.
Clean the gadget as you would any appliance. You can use glass cleaner on the glass of the meters, but be careful! The glass on any one of these meters may be loose, and if you press too hard you may dislodge it.

Reading the meter
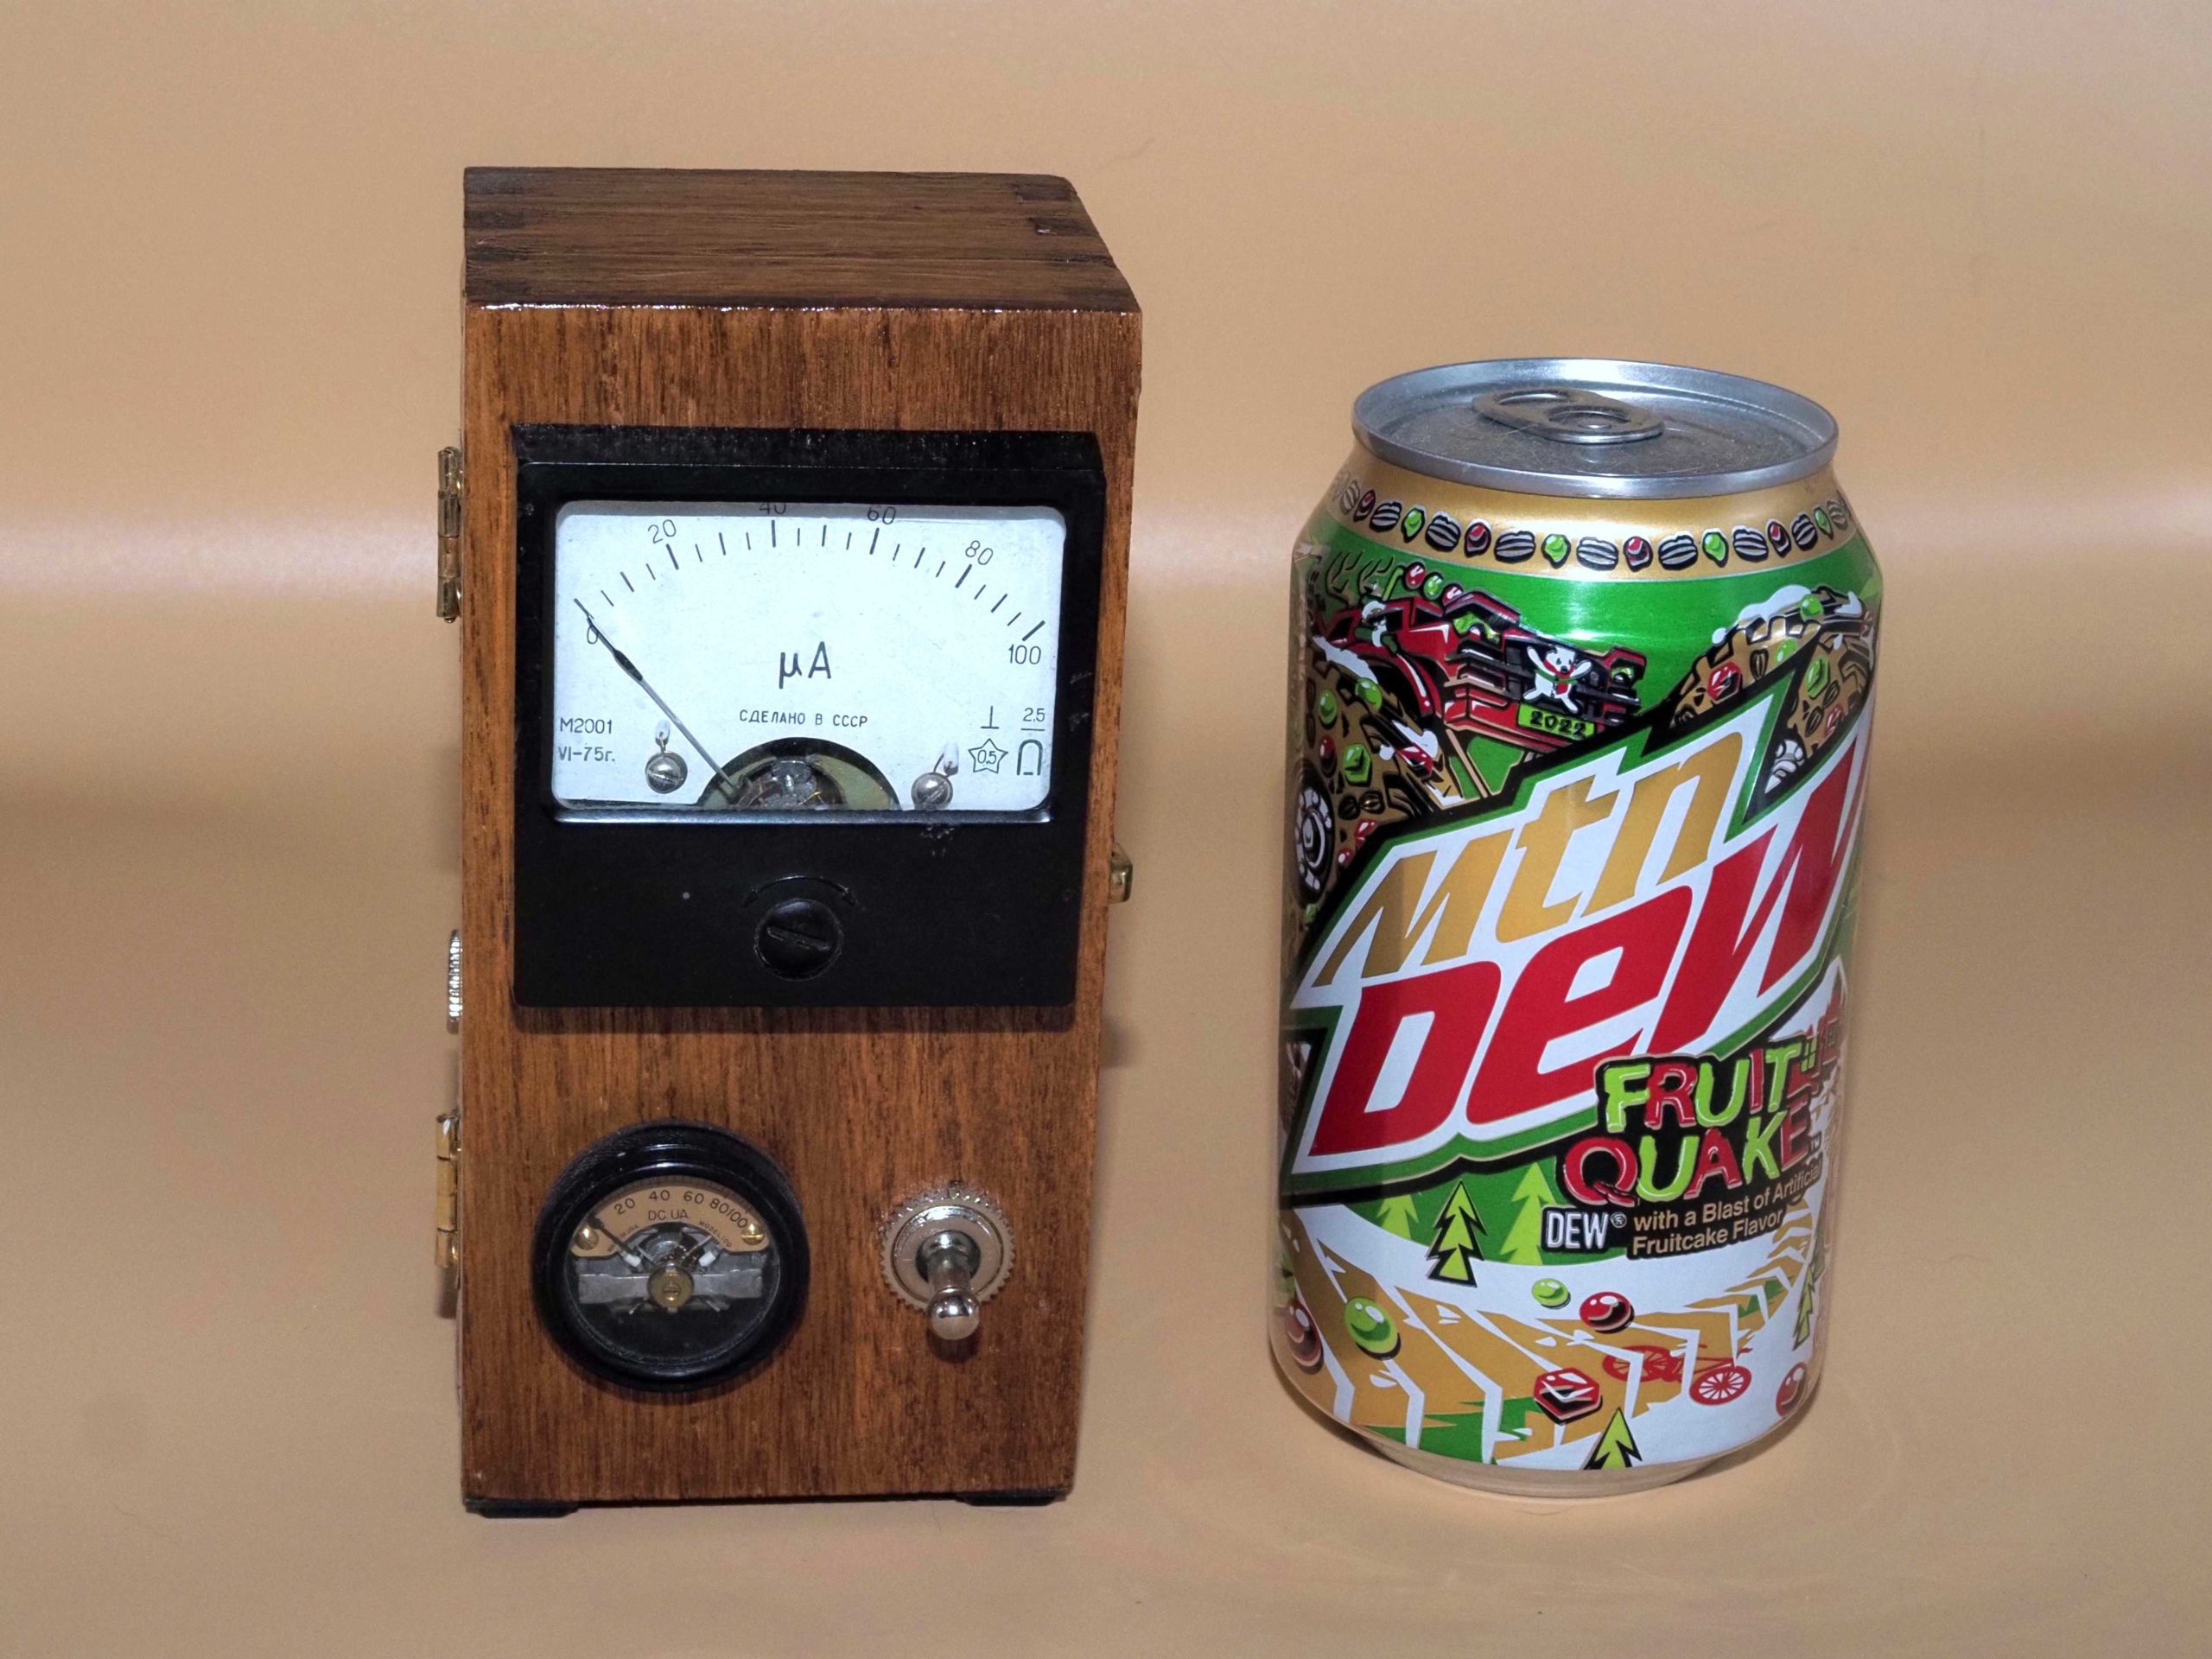
Both of these meters were designed to display current on a scale of 0-100 microamps. This makes it particularly easy to read the temperature and the humidity. I have calibrated the output of the controller so that the displays indicate either temperature in the range 0-100 degrees Fahrenheit, or relative humidity in the range 0-100%. In the two examples shown here, the reading is either 69 degrees (top picture), or 64% (bottom picture). Note that the gradations for the larger meter are 5 degrees, while those for the smaller meter are 4%.
Often during the summer months the temperature and humidity readings are very close. Read the instructions “How to use the Gadget” above for a technique to help remind you of which meter displays humidity.
Accuracy
This gadget uses a high-precision Silicon Labs Si7021 sensor. Nevertheless, this is not a laboratory instrument, and you should not expect highly accurate readings. My guess is that the temperature should be good to about 2 degrees, and the humidity to about 5%, over the expected indoor range of readings. See the section below on the gadget operation for more information about accuracy.
Longevity
The MB ammeter is probably between 60 and 80 years old. The Soviet meter is nearly 50 years old. Some of the meters in my projects are more than 120 years old, and amazingly, they still work. Most old meters are very well constructed and were designed for continuous use over a long haul. I hope that these meters have many more years of useful service in them, but there’s no way to tell when they might crap out. If they stop working, at least they are still beautiful antiques worth displaying!
How the gadget works
The ambient temperature and humidity are measured using a Silicon Labs Si7021 high-precision temperature/humidity sensor, which is mounted on the rear wall of the box. The detector is placed against a hole to allow access to the surrounding air. The sensor has a manufacturer-rated accuracy of +/- 1 degree Fahrenheit, and +/- 3% relative humidity. Readings are taken using an arduino nano and displayed on the meters using a simple resistor voltage divider against the internal resistances of the meters. The voltage is controlled using PWM on a digital pin. Older meters are often both nonlinear and out of calibration, so I calibrated the meter through its range by using a 4th-order polynomial to best-fit the measured temperature or humidity to displayed current. In practice, considering the accuracy of the sensor and the age of the meter, I would expect the displayed temperature to be accurate to about 2 degrees and the humidity to around 5%. I would also expect that over time the performance of the meter will degrade and drift a bit. Even so, I wouldn’t be surprised if the more probable failure point is the solid-state arduino controller rather than the mechanical ammeters!